
Stitch & Mend: A Beginner’s Guide to Visible Mending
In a world of fast fashion and disposable goods, the art of mending often feels like a forgotten skill. But there’s a growing movement embracing a different philosophy – one that values repair, sustainability, and the beauty of imperfection. This is where visible mending comes in. More than just fixing a hole, visible mending celebrates the life of a garment, turning flaws into features with intentional stitches and creative patches. This guide will walk you through everything a beginner needs to know to start their visible mending journey.
What is Visible Mending?
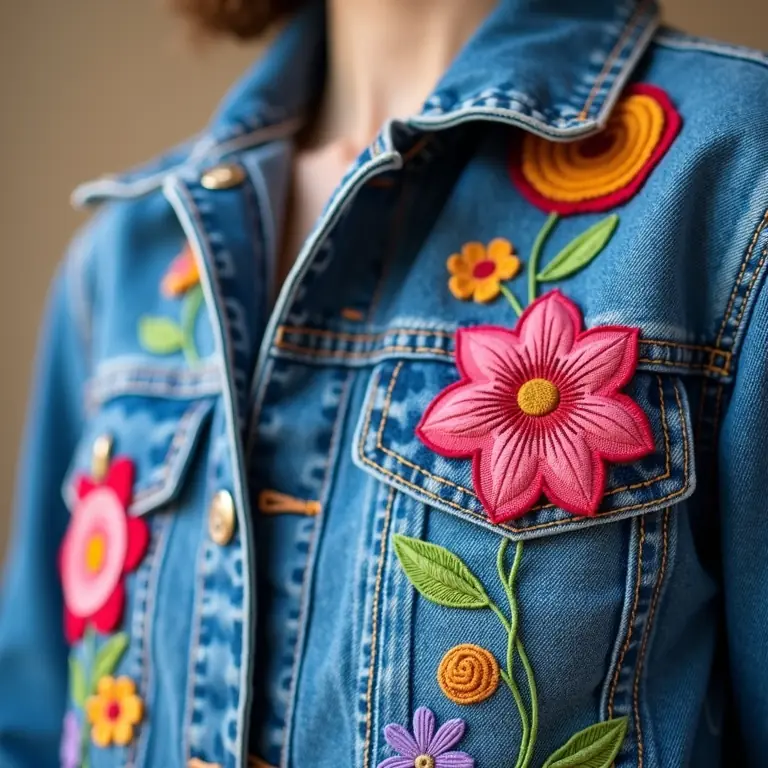
Visible mending, as the name suggests, isn’t about making repairs disappear. Traditional mending often aims for invisibility, blending stitches to match the fabric. Visible mending, however, *highlights* the repair. It’s about using contrasting threads, decorative stitches, or interesting patches to create a unique and beautiful embellishment. Think of it as a celebration of wear and tear, a visible story of the garment’s life.
It’s a fantastic way to extend the life of your clothes, reducing textile waste and saving money. But beyond the practical benefits, visible mending offers a mindful and creative outlet. It’s a slow craft that encourages you to connect with your belongings and appreciate the work that goes into making them.
Why Choose Visible Mending?
- Sustainability: Reducing textile waste is crucial. Visible mending gives your clothes a second life, keeping them out of landfills.
- Cost-Effective: Repairing is almost always cheaper than replacing.
- Unique Style: Visible mending allows you to personalize your garments and create one-of-a-kind pieces.
- Mindfulness: The process of mending can be incredibly therapeutic and grounding.
- Skill Development: Learning to mend empowers you to take care of your belongings and become more self-sufficient.
Gathering Your Supplies
The beauty of visible mending is that you don’t need a huge amount of specialized equipment to get started. Here’s a basic list:
- Needles: A variety of sizes is helpful. Crewel or embroidery needles are good for thicker threads and fabrics.
- Threads: This is where you can get creative! Use contrasting colors, different weights, or even multiple strands for a bolder look. Embroidery floss, yarn, and even repurposed fabric scraps can be used.
- Scissors: Sharp fabric scissors are essential.
- Pins: For holding fabric in place.
- Thimble: Protects your finger when hand-sewing.
- Fabric Scraps (for patches): Denim, cotton, linen, and wool are all good choices.
- Embroidery Hoop (optional): Can help keep the fabric taut while you work, especially for larger repairs.
- Seam Ripper: Useful for removing existing stitches.
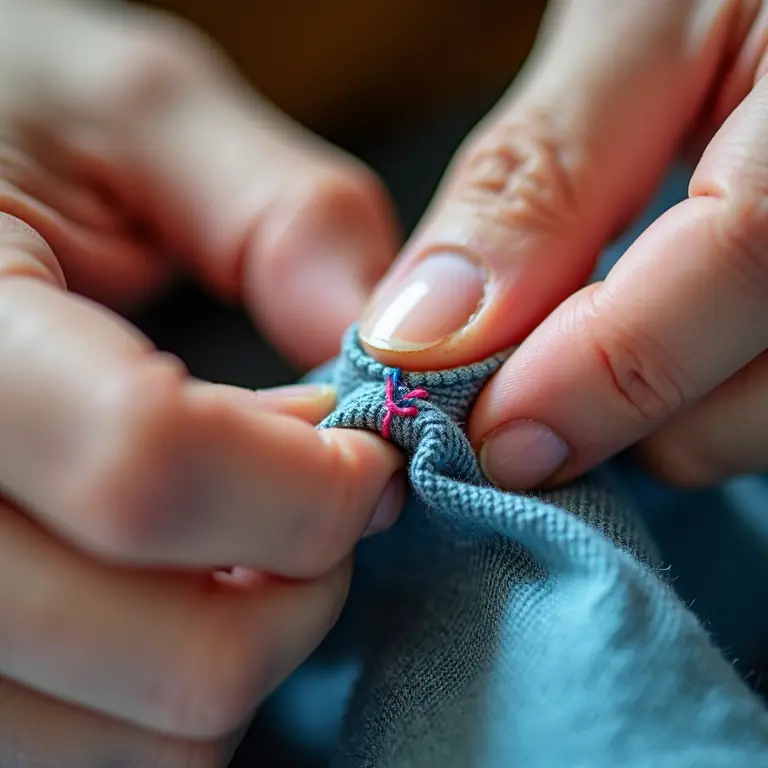
Essential Stitches for Visible Mending
You don’t need to be an expert seamstress to master visible mending. A few basic stitches will get you started. Here are some of the most useful:
1. Running Stitch
The simplest stitch of all. It’s great for quickly closing small holes or securing patches. Simply weave the needle in and out of the fabric, creating a dashed line.
2. Back Stitch
A stronger and more durable stitch than the running stitch. It’s perfect for reinforcing seams or mending larger tears. Each stitch goes *back* into the previous hole, creating a solid line.
3. Blanket Stitch
Ideal for securing edges and creating decorative borders. It’s often used to finish raw edges or attach patches. The stitch looks like a series of small loops.
4. Satin Stitch
A dense, smooth stitch that’s perfect for filling in small holes or creating decorative designs. It involves working closely spaced parallel stitches.
5. Darning
A classic mending technique for repairing holes in knitted or woven fabrics. It involves weaving new threads over the damaged area, creating a new fabric structure. There are several variations of darning, including Swiss darning and Japanese Sashiko darning (more on that later).
Before diving into these, watching a demonstration can be incredibly helpful. Here’s a video to get you started:
Visible Mending Techniques: A Step-by-Step Guide
1. Mending a Small Hole with a Patch
- Prepare the Hole: Trim any loose threads around the hole.
- Cut a Patch: Choose a fabric scrap that complements or contrasts with the garment. Cut a patch slightly larger than the hole.
- Pin the Patch: Place the patch over the hole, wrong side facing the garment, and pin in place.
- Stitch the Patch: Use a blanket stitch or running stitch to secure the patch to the garment. You can also use a decorative stitch for a more visible effect.
- Secure the Threads: Knot the thread securely on the wrong side of the fabric.
2. Darning a Hole in Knitwear
- Prepare the Hole: Gently stretch the fabric around the hole to prevent it from unraveling further.
- Anchor the Thread: Secure the thread on the wrong side of the fabric, a few stitches away from the hole.
- Weave the Warp Threads: Using a darning needle, weave the thread back and forth across the hole, creating a series of parallel threads (the warp). Keep the threads relatively loose.
- Weave the Weft Threads: Now weave the thread back and forth *perpendicular* to the warp threads, creating a new fabric structure. Alternate going over and under the warp threads.
- Secure the Threads: Knot the thread securely on the wrong side of the fabric.
3. Sashiko Darning (Japanese Mending)
Sashiko is a traditional Japanese mending technique that uses running stitches to create beautiful and intricate patterns. It’s often used to reinforce worn areas or repair holes in denim and other fabrics. The aesthetic is very intentional and beautiful. It’s a bit more advanced but incredibly rewarding.
- Prepare the Fabric: Stabilize the area around the hole with a backing fabric if needed.
- Plan Your Design: Sashiko often involves geometric patterns. Sketch out your design on the fabric with a fabric marker.
- Stitch the Design: Using a contrasting thread (typically white or indigo), stitch the design using a running stitch. The stitches should be evenly spaced and consistent in length.
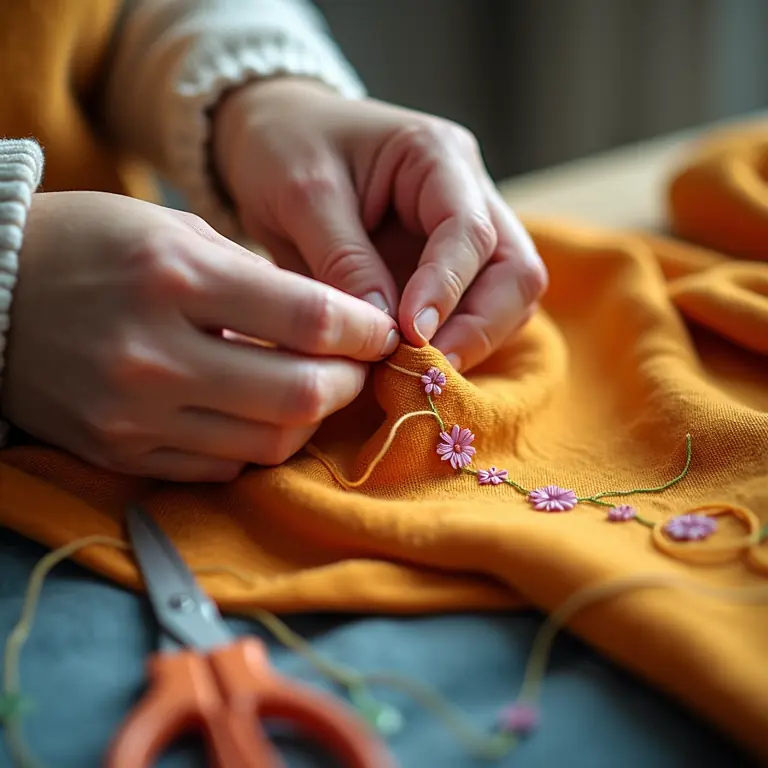
Beyond the Basics: Creative Visible Mending Ideas
- Embroidery: Add embroidered flowers, leaves, or other designs around the repair.
- Patchwork: Use a variety of fabric scraps to create a patchwork effect.
- Boro: Inspired by Japanese Boro textiles, layer patches of different fabrics together, creating a textured and visually interesting repair.
- Visible Mending as Art: Don’t be afraid to experiment with different stitches, colors, and materials to create a truly unique and artistic repair.
Caring for Your Mended Garments
Once you’ve mended your garment, it’s important to care for it properly to ensure your repairs last. Here are a few tips:
- Wash Gently: Hand washing or a delicate cycle in the washing machine is best.
- Avoid Harsh Detergents: Use a mild detergent.
- Air Dry: Avoid putting your mended garments in the dryer, as the heat can damage the repairs.
- Iron Carefully: If ironing is necessary, iron on a low setting and avoid ironing directly over the mended area.
Resources and Inspiration
Looking for more inspiration? Here are a few places to start:
- Instagram: Search for hashtags like #visiblemending, #sashiko, and #boro to see what other menders are creating.
- Pinterest: A great source for visual inspiration and tutorials.
- Online Workshops: Many online platforms offer visible mending workshops.
Embrace the Imperfection
The most important thing to remember about visible mending is to embrace the imperfection. It’s not about hiding flaws; it’s about celebrating them. It’s about giving your clothes a new story and a renewed life. It’s a powerful act of resistance against a culture of disposability. And it’s a deeply satisfying skill to learn.
If you’re looking for other ways to embrace a more sustainable and mindful lifestyle, you might enjoy reading about reviving and restoring furniture, decluttering your digital life, or building a backyard bird feeder.
So, gather your supplies, choose a garment in need of repair, and start stitching! You might be surprised at how much you enjoy the process.
Discussion about this post