
Craft a Cozy Corner: A Friendly Guide to Basic Upholstery
Have you ever looked at a worn-out chair, a tired ottoman, or a sad little stool and thought, “I wish I could fix that!”? Upholstery might seem like a daunting skill reserved for professionals, but with a little patience, the right tools, and a friendly guide, you can breathe new life into old furniture and create the cozy corner of your dreams. This guide will walk you through the basics of upholstery, from understanding the materials to completing simple projects. Don’t worry, we’ll start slow and build your confidence!
Why Upholster? More Than Just Saving Money
While saving money is a *great* benefit – and let’s be honest, reupholstering is often cheaper than buying new – upholstery offers so much more. It’s an incredibly rewarding skill. You’re rescuing a piece of furniture from the landfill, giving it a new lease on life. You’re also adding a personal touch to your home, choosing fabrics that perfectly reflect your style. Plus, there’s a deep satisfaction in saying, “I made that!” It’s a sustainable practice, and a fantastic way to express creativity.
Gathering Your Tools: The Upholsterer’s Toolkit
Before you dive in, let’s gather the essentials. You don’t need a professional workshop, but having the right tools makes all the difference. Here’s a breakdown:
- Staple Gun: This is your workhorse. A heavy-duty staple gun is essential, and you’ll want to invest in a good quality one. Pneumatic staple guns are fantastic if you have an air compressor, but a manual staple gun will do for smaller projects.
- Staples: Different projects require different staple sizes. Have a variety on hand!
- Staple Remover: Because mistakes happen (and that’s okay!). A staple remover is crucial for correcting errors and taking things apart.
- Needle-Nose Pliers: For pulling staples that the remover can’t quite reach, and for general maneuvering.
- Rubber Mallet: For gently tapping fabric into place and seating staples.
- Scissors: Sharp fabric scissors are a must. Don’t use your paper scissors!
- Seam Ripper: Another essential for undoing mistakes and carefully dismantling existing upholstery.
- Measuring Tape: Accuracy is key!
- Marker or Chalk: For marking fabric.
- Screwdrivers: For disassembling furniture.
- Webbing Stretcher: For tightening webbing (more on this later).
- Upholstery Needles: Long, strong needles for hand-sewing.
- Thread: Heavy-duty upholstery thread.
Understanding Upholstery Materials: The Building Blocks of Comfort
Upholstery isn’t just about the fabric you see on the outside. Several layers contribute to the comfort and structure of upholstered furniture. Let’s break them down:
- Frame: The foundation of the piece. Frames are typically made of wood or metal.
- Webbing: Stretched across the frame to provide support. Jute webbing is traditional, while synthetic webbing is more durable and resistant to sagging.
- Springs: (Optional, but common in seats) Add extra comfort and support. Different types include coil springs, sinuous springs, and pocket springs.
- Burlap: A layer of fabric placed over the springs or webbing to create a smooth surface for the padding.
- Padding: This is where the comfort really comes in! Materials include cotton batting, polyester fiberfill, foam, and down.
- Fabric: The final layer, the one you see! Choose a fabric that’s durable, aesthetically pleasing, and appropriate for the piece’s use.
Your First Project: Reupholstering a Simple Stool
Let’s start with a beginner-friendly project: a simple stool. This will give you a chance to practice the basic techniques without getting overwhelmed.
Step 1: Disassembly
Carefully remove the old fabric. Use your seam ripper and staple remover to gently detach the fabric, taking note of how it was originally attached. This will be your guide for reassembly. Save the old fabric pieces – they can serve as patterns!
Step 2: Inspect and Repair the Frame
Check the frame for any damage. Repair any loose joints or cracks with wood glue and clamps. If the webbing is sagging, use a webbing stretcher to tighten it. If the webbing is damaged, replace it entirely.
Step 3: Cutting the Fabric
Lay your old fabric pieces onto your new fabric and trace around them, adding about an inch of extra fabric all around for seam allowance. Cut out the fabric pieces.
Step 4: Attaching the Fabric
Start by centering the fabric on the stool seat. Pull the fabric taut and staple it to the underside of the seat, starting with one staple in the center of each side. Then, work your way outwards, adding more staples and ensuring the fabric remains smooth and evenly stretched. Use your rubber mallet to gently tap the staples in securely.
Step 5: Finishing Touches
Trim any excess fabric. Inspect your work and add more staples if needed. Congratulations, you’ve reupholstered your first stool!
Moving On: Reupholstering a Chair Seat
Now that you’ve mastered the stool, let’s tackle a chair seat. This is a bit more complex, but the principles are the same.
Dealing with Springs
If your chair has springs, you’ll need to address them before adding padding. Inspect the springs for damage. Replace any broken springs. Tie the springs together with twine to create a unified support system. Then, cover the springs with burlap to prevent the padding from sinking between them.
Adding Padding
Cut your padding material to the shape of the chair seat, allowing for extra material to wrap around the edges. Layer the padding, starting with a firmer layer (like foam) and finishing with a softer layer (like fiberfill). Secure the padding to the burlap with upholstery pins or spray adhesive.
Attaching the Fabric (Similar to the Stool)
Follow the same process as with the stool – center the fabric, staple it in place, working from the center outwards, and ensuring a taut, smooth finish.
Fabric Choices: Finding the Perfect Look and Feel
Choosing the right fabric is crucial. Consider these factors:
- Durability: How much wear and tear will the furniture receive? For high-traffic areas, choose a durable fabric like denim, canvas, or microfiber.
- Pattern: Bold patterns can hide imperfections, while solid colors offer a more sophisticated look.
- Texture: Consider the texture of the fabric. Velvet is luxurious, linen is casual, and leather is classic.
- Cleanability: Can the fabric be easily cleaned? This is especially important for furniture that will be used by children or pets.
- Cost: Fabric prices vary widely. Set a budget before you start shopping.
Advanced Techniques: Beyond the Basics
Once you’re comfortable with the basics, you can explore more advanced techniques:
- Pattern Matching: For fabrics with a pattern, learning to match the pattern at the seams is essential for a professional look.
- Welt Cording: Adding welting (a decorative cord) to the edges of upholstered furniture adds a touch of sophistication.
- Tufting: Creating a button-tufted effect adds depth and texture.
- Slipcovering: Making a removable slipcover is a great way to protect furniture and change its look seasonally.
Troubleshooting Common Upholstery Problems
Even experienced upholsterers encounter problems. Here are a few common issues and how to solve them:
- Sagging Fabric: Add more staples or tighten the webbing.
- Uneven Fabric: Remove staples and re-stretch the fabric.
- Staples Not Holding: Use a heavier-duty staple gun or try a different type of staple.
- Fabric Tears: Patch the tear with a fabric patch and upholstery glue.
Sometimes, technology can also present challenges. If you’re struggling with a smart device while taking a break from your upholstery, a guide like Troubleshoot Tech Troubles: A Friendly Guide to Basic Smartphone Repair might be helpful.
The Importance of Patience and Practice
Upholstery takes time and practice. Don’t get discouraged if your first few projects aren’t perfect. The key is to be patient, pay attention to detail, and learn from your mistakes. Start with small projects and gradually work your way up to more complex ones.
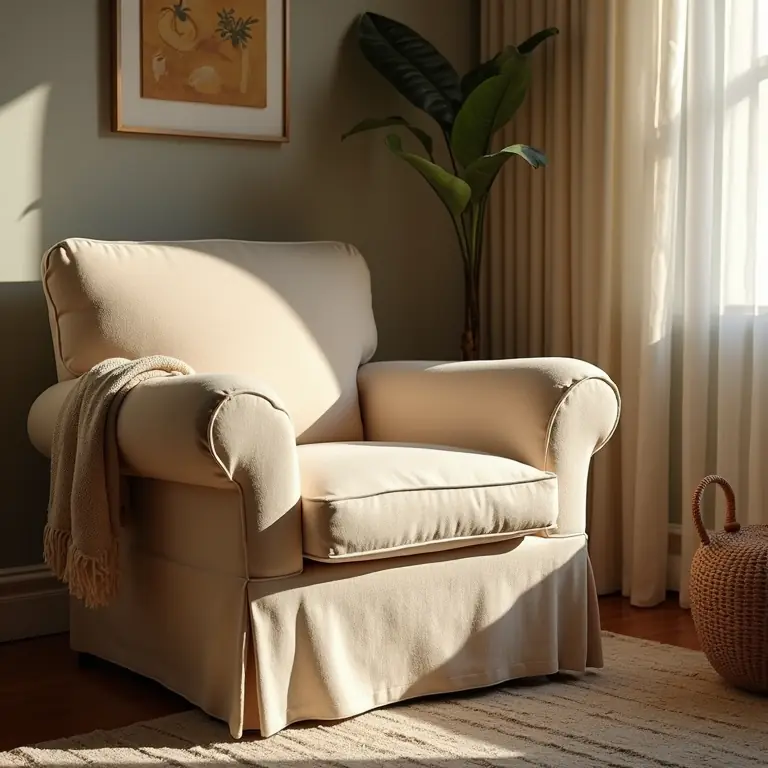
Creating a Cozy Atmosphere: Beyond Upholstery
Upholstery is just one piece of the puzzle when it comes to creating a cozy corner. Consider adding soft lighting, comfortable cushions, warm throws, and personal touches like artwork and books. Taking time for mindful activities nearby, like Compose Your Calm: A Friendly Guide to Mindful Nature Journaling, can also enhance the feeling of relaxation and wellbeing. Don’t forget the power of scent – candles or essential oil diffusers can create a welcoming atmosphere.
And if you’re feeling inspired to explore your roots while enjoying your newly upholstered furniture, delving into Untangle Your Family Tree: A Friendly Guide to Genealogical Research can add another layer of comfort and connection to your cozy corner.
Resources for Further Learning
Here are some helpful resources to continue your upholstery journey:
- Online Tutorials: YouTube is a treasure trove of upholstery tutorials.
- Books: Search for upholstery books at your local library or bookstore.
- Workshops: Consider taking an upholstery workshop to learn from a professional.
- Online Forums: Connect with other upholsterers online to share tips and advice.
Final Thoughts: Embrace the Process!
Upholstery is a skill that takes time and dedication, but the rewards are well worth the effort. You’ll not only save money and give new life to old furniture, but you’ll also gain a sense of accomplishment and creative satisfaction. So, gather your tools, choose your fabric, and dive in! And remember, have fun with it – that’s the most important part.
Discussion about this post