
Capture the Light: A Friendly Guide to Basic Food Styling

So, you love to cook. Wonderful! But sometimes, that beautiful dish you’ve painstakingly created… just doesn’t *look* as good as it tastes in photos. You’re not alone! Food styling is a skill, and like any skill, it takes practice. This guide will walk you through the basics, from understanding light and composition to practical techniques to make your food look its absolute best. Don’t worry, you don’t need to be a professional chef or photographer. We’ll keep it friendly and approachable.
Why Bother with Food Styling?
You might be thinking, “Why spend extra time making food look pretty? It’s going to be eaten!” That’s a fair point. But consider the power of visual appeal. Beautifully styled food captures attention. It makes people want to try your recipes, visit your blog, or simply appreciate your culinary creations. In the age of Instagram and food blogs, presentation is a huge part of the experience. Plus, the act of styling itself forces you to be more mindful of your cooking – a little extra care translates into a more appealing final product, even before the camera comes out.
Understanding the Fundamentals: Light, Composition, and Color
Light: The Most Important Ingredient
Forget fancy props for a moment; light is your most crucial tool. Good light can make even the simplest dish look stunning, while bad light can ruin even the most elaborate creation. Here’s what you need to know:
- Natural Light is King: Whenever possible, use natural light. Position your setup near a window, but avoid direct sunlight, which can create harsh shadows. A slightly overcast day is ideal, providing soft, diffused light.
- Diffusing the Light: If the natural light is too strong, use a sheer curtain or a piece of white fabric to diffuse it. This will soften the shadows and create a more flattering look.
- Artificial Light: If natural light isn’t available, use artificial light. Softboxes or umbrellas can help diffuse the light and create a more natural look. Avoid using on-camera flash, which tends to be harsh and unflattering.
- Light Direction: Experiment with different light angles. Side lighting can create dramatic shadows and highlight texture, while front lighting can create a more even and bright look. Backlighting can create a beautiful glow, but it’s trickier to master.
Composition: Arranging Your Scene
Composition is how you arrange the elements in your scene. Here are some basic principles to keep in mind:
- Rule of Thirds: Imagine dividing your frame into nine equal parts with two horizontal and two vertical lines. Place your main subject at the intersection of these lines for a more visually appealing composition.
- Leading Lines: Use lines (like cutlery, ingredients, or even shadows) to lead the viewer’s eye to the main subject.
- Negative Space: Don’t be afraid of empty space. Negative space can help draw attention to the subject and create a sense of balance.
- Layers and Depth: Create depth by layering elements in your scene. For example, you could place a bowl of soup in the foreground, with a loaf of bread and some herbs in the background.
- Angles: Experiment with different angles. Overhead shots (flat lays) are popular for showing the arrangement of ingredients, while eye-level shots are great for showcasing height and texture.
Color: A Feast for the Eyes
Color plays a huge role in how we perceive food. Here’s how to use it to your advantage:
- Complementary Colors: Colors that are opposite each other on the color wheel (like red and green, or blue and orange) create a vibrant and eye-catching contrast.
- Analogous Colors: Colors that are next to each other on the color wheel (like blue, blue-green, and green) create a harmonious and calming effect.
- Color Harmony: Consider the overall color palette of your scene. A cohesive color scheme will make your photos look more polished and professional.
- Freshness: Use fresh ingredients with vibrant colors. Wilted or bruised produce will look unappetizing.
Practical Food Styling Techniques
Working with Different Types of Food
Different foods require different styling techniques. Here’s a breakdown:
Fruits and Vegetables
- Shine it Up: Brush fruits and vegetables with a light coating of water or glycerin to make them look fresh and glossy.
- Slice and Dice Strategically: Cut fruits and vegetables in a way that showcases their texture and color. Consider using different shapes and sizes.
- Embrace Imperfection: Don’t strive for perfect symmetry. A few blemishes or uneven cuts can make your food look more natural and appealing.
Baked Goods
- Dust with Powdered Sugar: A light dusting of powdered sugar can make cakes and cookies look more inviting.
- Add Glaze or Frosting: Glaze or frosting can add shine and color.
- Showcase Texture: Highlight the crumb of a cake or the flaky layers of a pastry.
- Props: Use props like linen napkins, wooden boards, or vintage silverware to create a cozy and inviting atmosphere.
Meat and Seafood
- Marinate for Color: Marinating meat or seafood can enhance its color and flavor.
- Brush with Oil: Brush meat or seafood with oil to make it look glossy and succulent.
- Garnish with Herbs: Garnish with fresh herbs to add color and freshness.
- Don’t Overcook: Overcooked meat or seafood will look dry and unappetizing.
Liquids (Soups, Sauces, Drinks)
- Garnish Strategically: A swirl of cream, a sprinkle of herbs, or a wedge of citrus can elevate the look of a liquid.
- Control the Spill: A small, controlled spill can add a sense of dynamism, but avoid making it look messy.
- Use Clear Glassware: Clear glassware allows you to showcase the color and texture of the liquid.
- Bubbles: For carbonated drinks, a few strategically placed bubbles can add visual interest.
Essential Styling Tools
You don’t need a ton of expensive equipment to get started. Here are a few essential tools:
- Tweezers: For precise placement of small ingredients.
- Pastry Brushes: For applying oil, water, or glaze.
- Spray Bottle: For misting food with water to keep it looking fresh.
- Paper Towels: For cleaning up spills and dabbing away excess moisture.
- Small Knives: For delicate cutting and shaping.
- Props: Linens, plates, bowls, cutlery, wooden boards, and other items to add texture and interest.
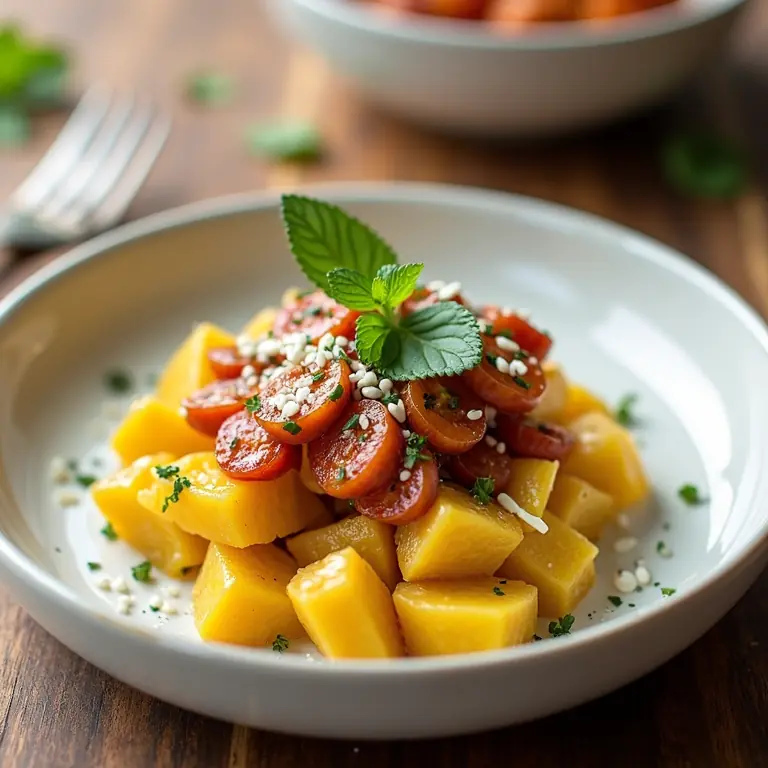
Putting it All Together: A Step-by-Step Example (Styling a Salad)
- Choose Your Bowl: Select a bowl that complements the colors of the salad. A white or neutral-colored bowl will allow the ingredients to stand out.
- Layer the Ingredients: Start with the base of the salad (e.g., lettuce). Then, add the other ingredients in layers, considering color and texture. Don’t just dump everything in!
- Add Height and Texture: Arrange the ingredients to create height and visual interest. Use different shapes and sizes of ingredients.
- Garnish: Add a garnish, such as fresh herbs, edible flowers, or a sprinkle of nuts.
- Light and Composition: Position the salad near a window with diffused light. Use the rule of thirds to create a balanced composition.
- Take the Photo: Experiment with different angles and settings until you’re happy with the result.
Don’t Be Afraid to Experiment!
Food styling is a creative process. Don’t be afraid to try new things and experiment with different techniques. There’s no single “right” way to do it. The more you practice, the better you’ll become at creating beautiful and appetizing food photos. Remember, it’s about making the food look as delicious as it tastes.
Want to delve into other creative pursuits? Check out this guide on basic jewelry making or learn how to repair your denim. For a different artistic outlet, you might enjoy this guide to basic calligraphy.
Here’s a helpful video to further inspire your food presentation skills:
Resources for Further Learning
There are tons of great resources available online to help you improve your food styling skills. Here are a few:
- Food Styling Blogs: Search for food styling blogs for inspiration and tutorials.
- Instagram: Follow food stylists on Instagram to see their work.
- Online Courses: Consider taking an online course on food styling.
- Pinterest: Pinterest is a great source of visual inspiration.
Final Thoughts
Food styling is a fun and rewarding skill that can enhance your cooking and photography. Remember to focus on light, composition, and color, and don’t be afraid to experiment. With a little practice, you’ll be creating beautiful food photos in no time! So go ahead, get creative, and capture the light!
Discussion about this post