
Build a Backyard Weather Station: A Friendly Guide to Atmospheric Monitoring
Have you ever wondered what’s *really* going on with the weather around your home? Beyond simply checking the forecast, building your own backyard weather station offers a fascinating way to understand atmospheric conditions firsthand. It’s a rewarding project that blends science, DIY skills, and a deeper connection to the natural world. This guide will walk you through everything you need to know, from choosing the right equipment to interpreting the data you collect. Don’t worry if you’re not a meteorologist – we’ll keep things friendly and easy to understand!
Why Build a Backyard Weather Station?
There are plenty of reasons to embark on this project. Here are a few:
- Educational Value: It’s a fantastic learning experience for all ages, teaching about meteorology, data analysis, and the scientific method.
- Hyperlocal Data: Official weather reports provide regional averages. Your station gives you data specific to *your* microclimate – crucial for gardening, outdoor activities, and understanding local weather patterns.
- Personal Interest: It’s simply fun! Tracking weather changes and comparing your data to forecasts can become a captivating hobby.
- Data Sharing: You can contribute your data to citizen science projects, helping researchers understand regional and global weather trends.
What Will You Measure? Essential Weather Parameters
A comprehensive weather station measures several key atmospheric parameters. Here’s a breakdown of what you’ll need to track:
- Temperature: Measured in Celsius (°C) or Fahrenheit (°F). Essential for understanding heating and cooling trends.
- Humidity: The amount of moisture in the air, expressed as a percentage. Influences comfort levels and can indicate potential for precipitation.
- Atmospheric Pressure: The weight of the air above a given point, measured in millibars (mb) or inches of mercury (inHg). Changes in pressure often precede weather changes.
- Wind Speed: How fast the wind is blowing, typically measured in miles per hour (mph) or kilometers per hour (km/h).
- Wind Direction: The direction from which the wind is blowing (e.g., North, South, East, West).
- Rainfall: The amount of precipitation that has fallen, measured in millimeters (mm) or inches (in).
- Solar Radiation: The intensity of the sun’s energy, measured in watts per square meter (W/m²). Important for understanding heating and evaporation rates.
Choosing Your Equipment: From Basic to Advanced
The cost and complexity of your weather station can vary greatly. Here’s a look at your options:
Basic Analog Station (Under $100)
These stations typically include a thermometer, hygrometer, barometer, and a rain gauge. They require manual readings and recording. While less technologically advanced, they’re a great starting point for learning and are very affordable. Look for stations with clear, easy-to-read dials.
Digital Weather Station ( $100 – $500)
Digital stations offer automated readings and often include a console that displays data. Many also feature wireless sensors, allowing you to place them in optimal locations without running cables. They often include features like:
- Data Logging: Automatically records data over time.
- Alarms: Alerts you to extreme weather conditions.
- Time and Date: Convenient built-in clock.
- Forecasts: Some stations can predict future weather based on current readings.
Advanced Weather Station ($500+)
These stations are for serious enthusiasts. They offer the most accurate readings, advanced features, and the ability to connect to the internet for data sharing. Features might include:
- Networking Capabilities: Upload data to online weather networks (e.g., Weather Underground).
- Software Integration: Analyze data with specialized software.
- Professional-Grade Sensors: More accurate and durable sensors.
- Solar Radiation Sensors: Precise measurement of solar energy.
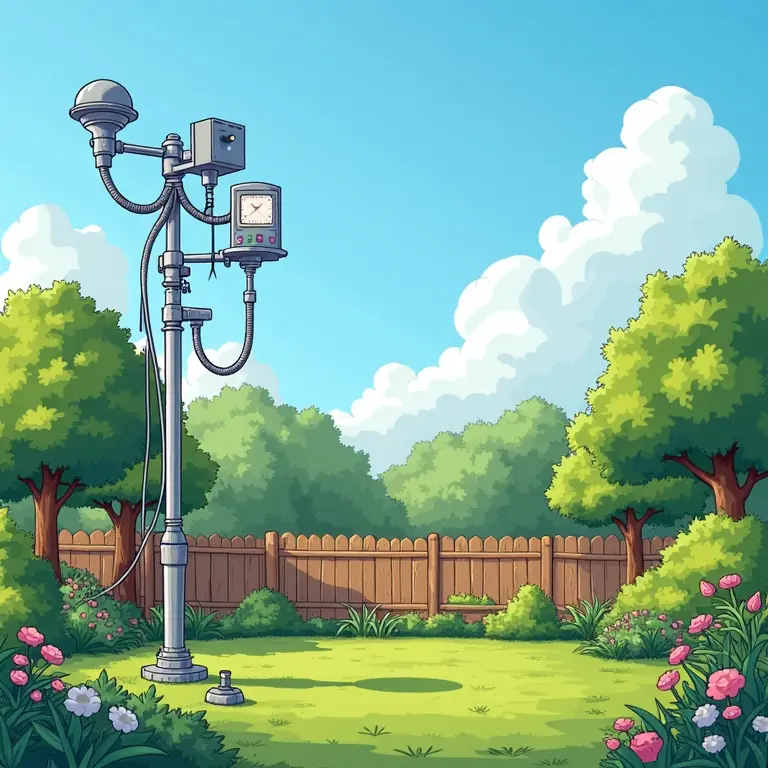
Setting Up Your Weather Station: Location, Location, Location!
Proper placement is crucial for accurate readings. Here are some guidelines:
- Temperature/Humidity Sensor: Shield from direct sunlight and precipitation. A ventilated radiation shield is highly recommended. Place it about 4-6 feet above the ground.
- Anemometer (Wind Speed/Direction): Mount it on a pole at least 10 feet above the ground, clear of obstructions like trees and buildings.
- Rain Gauge: Place it in an open area, away from trees and buildings that could block rainfall. Ensure the opening is level.
- Barometer: Keep it indoors, away from drafts and direct sunlight. Altitude adjustments may be necessary for accurate readings.
Avoid placing sensors near heat sources (e.g., air conditioning units, vents) or reflective surfaces that could skew readings.
Understanding Your Data: Decoding the Atmospheric Signals
Collecting data is only half the battle. You need to understand what it means! Here’s a brief overview of how to interpret common weather parameters:
- Falling Barometric Pressure: Typically indicates approaching low-pressure system, often associated with cloudy, wet weather.
- Rising Barometric Pressure: Suggests a high-pressure system, usually bringing clear, dry weather.
- High Humidity: Can make the air feel sticky and uncomfortable. Increases the likelihood of fog or precipitation.
- Strong Winds from the South: Often bring warmer temperatures and moist air.
- Sudden Temperature Drop: May indicate the passage of a cold front.
Don’t be afraid to experiment and compare your data to official forecasts. Over time, you’ll develop a better understanding of the unique weather patterns in your area.
Maintaining Your Weather Station
Regular maintenance is essential for accurate and reliable data.
- Clean Sensors: Remove dust, debris, and spiderwebs from sensors regularly.
- Check Rain Gauge: Ensure the rain gauge is free of obstructions and functioning properly.
- Replace Batteries: Replace batteries in wireless sensors as needed.
- Calibrate Sensors: Some sensors may require periodic calibration to maintain accuracy. Consult your station’s manual for instructions.
- Inspect Wiring: If you have a wired station, check the wiring for damage.
Advanced Projects and Data Analysis
Once you’re comfortable with the basics, you can explore more advanced projects:
- Data Logging and Visualization: Use software like Excel or dedicated weather software to create graphs and charts of your data.
- Automated Data Upload: Connect your station to the internet and upload your data to online weather networks.
- Build Your Own Sensors: For the truly adventurous, you can build your own sensors using microcontrollers like Arduino.
- Compare Data with Neighbors: Share your data with neighbors to create a hyperlocal weather network.
Resources and Further Learning
Here are some helpful resources to expand your knowledge:
- National Weather Service: https://www.weather.gov/
- Weather Underground: https://www.wunderground.com/
- Citizen Weather Observer Program: https://www.wxqa.com/
Beyond the Basics: Exploring Related Skills
Building a weather station can spark an interest in other fascinating fields. Perhaps you’ll want to explore visual thinking through sketch noting, or delve into the mechanical world by restoring antique typewriters. The possibilities are endless! Even the ancient art of origami can offer a mindful break from data analysis.
Monitoring atmospheric composition is a crucial aspect of understanding our planet’s health. The video above provides a fascinating overview of this complex field.
Troubleshooting Common Issues
Even with careful setup, you might encounter some issues:
- Inaccurate Readings: Check sensor placement, calibration, and battery levels.
- Wireless Connectivity Issues: Ensure the console and sensors are within range. Replace batteries. Check for interference from other devices.
- Data Logging Problems: Verify that the data logging function is enabled and that there is sufficient storage space.
- Rain Gauge Not Registering Rainfall: Clean the rain gauge and ensure it’s level.
Final Thoughts
Building a backyard weather station is a rewarding project that offers a unique opportunity to learn about the atmosphere and connect with the natural world. Don’t be afraid to start small and experiment. With a little patience and effort, you’ll be well on your way to becoming a backyard meteorologist!
Discussion about this post