
Build a Better Bulletin Board: A Friendly Guide to Creative Scrapbooking Layouts
Bulletin boards. They’re those often-overlooked spaces in our homes, classrooms, and offices that can be so much more than just a place to stick reminders and flyers. They can be vibrant displays of personality, inspiration, and creativity. But let’s be honest, many bulletin boards end up looking…well, cluttered. This guide is here to help you transform your bulletin board from a chaotic mess into a visually appealing and organized space using the principles of scrapbooking layout. We’ll cover everything from planning and color schemes to layering and embellishments, all with a friendly and approachable tone. Think of it as scrapbooking, but for your wall!
Why Scrapbooking Principles for Bulletin Boards?
You might be wondering what scrapbooking has to do with bulletin boards. The answer is: a lot! Scrapbooking is all about visually telling a story, and a bulletin board can tell a story – a story about your interests, memories, goals, or simply a visually pleasing theme. Scrapbookers carefully consider layout, color harmony, balance, and embellishments to create visually engaging pages. We can apply those same principles to create a bulletin board that’s not just functional, but also beautiful and inspiring.
Step 1: Planning Your Layout – The Foundation of a Great Board
Before you even think about pinning anything up, take a moment to plan. This is the most crucial step. Just like a scrapbook page, a good bulletin board layout needs a foundation. Consider these questions:
- What’s the Purpose? Is this board for reminders, inspiration, photos, or a combination? Knowing the purpose will dictate the content and overall style.
- What’s the Theme? Themes can tie everything together. Think seasonal (spring flowers, fall leaves), motivational (quotes, inspiring images), or based on a hobby (travel, cooking, reading).
- What Size and Shape is Your Board? A large rectangular board will allow for more complex layouts than a small square one.
- What’s the Background? Consider covering the bulletin board with fabric, patterned paper, or even paint to create a cohesive look. A neutral background is often a good starting point, allowing your pinned items to really pop.
Sketch out a rough layout on paper. Don’t worry about perfection at this stage; it’s just about visualizing the arrangement. Think about where you want to place anchor elements (larger items, photos, or focal points) and how you’ll balance them with smaller items.
Step 2: Color Schemes – Setting the Mood
Color plays a huge role in how we perceive a space. A well-chosen color scheme can make your bulletin board feel inviting, energizing, or calming. Here are a few approaches:
- Monochromatic: Using different shades of a single color. This creates a sophisticated and harmonious look.
- Analogous: Using colors that are next to each other on the color wheel (e.g., blue, blue-green, green). This is visually pleasing and creates a sense of unity.
- Complementary: Using colors that are opposite each other on the color wheel (e.g., red and green, blue and orange). This creates a bold and dynamic contrast.
- Triadic: Using three colors equally spaced on the color wheel (e.g., red, yellow, blue). This is vibrant and energetic.
Don’t be afraid to use a color palette generator online to help you find harmonious color combinations. Think about the overall mood you want to create. Warm colors (red, orange, yellow) are energizing, while cool colors (blue, green, purple) are calming.
Step 3: The Power of Layering – Adding Depth and Dimension
Layering is a key technique in both scrapbooking and bulletin board design. It’s about creating depth and visual interest by overlapping elements. Here’s how to do it:
- Start with a Background Layer: As mentioned earlier, fabric, paper, or paint.
- Anchor Elements: Place larger items first – photos, inspirational quotes, artwork. These will be the focal points of your board.
- Mid-Ground Layers: Add medium-sized items around the anchor elements – postcards, patterned paper, small decorations.
- Foreground Layers: Finish with smaller items – stickers, ribbons, paper clips, washi tape. These add detail and personality.
Don’t be afraid to overlap items slightly. This creates a sense of depth and makes the board feel more dynamic. Think about varying textures – combining smooth paper with rough fabric or shiny embellishments with matte photos.
Step 4: Balancing Your Board – Creating Visual Harmony
Balance is crucial for a visually pleasing layout. There are two main types of balance:
- Symmetrical Balance: Arranging elements equally on both sides of a central axis. This creates a sense of formality and stability.
- Asymmetrical Balance: Arranging elements differently on each side of a central axis, but still achieving a sense of visual equilibrium. This is more dynamic and visually interesting.
Asymmetrical balance is often easier to achieve and more visually appealing. You can balance a large element on one side of the board with several smaller elements on the other side. Consider the visual “weight” of each item – darker colors and larger sizes tend to have more weight. Step back frequently to assess the balance of your board and make adjustments as needed.
Step 5: Embellishments – Adding Personality and Flair
Embellishments are the finishing touches that bring your bulletin board to life. They add personality, flair, and visual interest. Here are some ideas:
- Ribbons and Twine: Use ribbons and twine to create borders, accents, or to hang small items.
- Stickers: Stickers are a quick and easy way to add color and detail.
- Washi Tape: Washi tape is versatile and comes in a wide variety of colors and patterns. Use it to create borders, frames, or to attach items.
- Paper Clips: Decorative paper clips can add a touch of whimsy.
- Buttons and Beads: Add texture and dimension with buttons and beads.
- Flowers (Real or Artificial): Flowers can add a touch of natural beauty.
- Handmade Elements: Consider creating your own embellishments – drawings, painted paper, or origami.
Don’t overdo it with embellishments. Too many can make the board feel cluttered and overwhelming. Choose embellishments that complement your theme and color scheme.
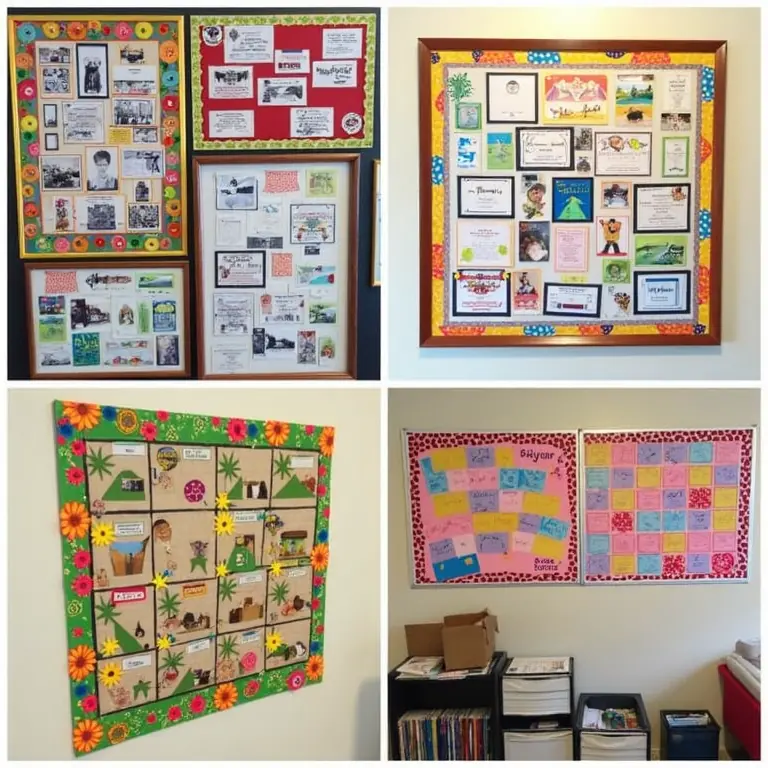
Step 6: Arrangement Techniques – Specific Layout Ideas
Now that we’ve covered the basics, let’s look at some specific arrangement techniques:
- Grid Layout: Arranging items in a neat and orderly grid. This is a good option for boards with a lot of information.
- Cluster Layout: Grouping items together in clusters. This creates a more dynamic and visually interesting look.
- Waterfall Layout: Arranging items in a cascading pattern, flowing down the board.
- Focal Point Layout: Creating a strong focal point and arranging items around it.
- Zig-Zag Layout: Arranging items in a zig-zag pattern across the board.
Experiment with different arrangements to see what works best for you. Don’t be afraid to rearrange items until you’re happy with the result.
Step 7: Keep it Fresh – Regular Updates
A bulletin board isn’t a static display. To keep it engaging and relevant, it’s important to update it regularly. Remove old items, add new ones, and rearrange the layout. This will prevent it from becoming stale and will keep you inspired. Consider rotating the theme seasonally or based on your changing interests.
Beyond the Basics: Combining Techniques
The real magic happens when you combine these techniques. For example, you could use a grid layout for a section of the board dedicated to reminders, and a cluster layout for a section showcasing photos. Or you could use a monochromatic color scheme with pops of complementary colors for visual interest.
Resources & Inspiration
Looking for more inspiration? Check out these resources:
- Pinterest: Search for “bulletin board ideas” or “scrapbook layouts” for endless inspiration.
- Instagram: Follow hashtags like #bulletinboard, #scrapbooking, and #homedecor.
- Online Tutorials: YouTube is a great source of tutorials on scrapbooking techniques. Here’s a video with some spring bulletin board ideas:
Expanding Your Creative Horizons
Feeling inspired to tackle other creative projects? Perhaps you’d like to try your hand at restoring a vintage radio? Check out this guide for a step-by-step walkthrough. Or maybe you’re interested in the Japanese art of Kintsugi, repairing broken items with gold? Learn more about Kintsugi here. And if you’re looking to bring more nature into your space, building a birdbath is a wonderful project.
Final Thoughts
Creating a beautiful and functional bulletin board is a fun and rewarding project. By applying the principles of scrapbooking layout, you can transform a cluttered space into a visually appealing and inspiring display. Remember to plan your layout, choose a harmonious color scheme, layer elements for depth, balance the composition, and add personal embellishments. Don’t be afraid to experiment and have fun! With a little creativity, you can build a bulletin board that you’ll love looking at every day.
Discussion about this post