
Build a Better Batch: A Friendly Guide to Kombucha Brewing
Kombucha. The fizzy, tangy, slightly sweet beverage that’s taken the health and wellness world by storm. But did you know you can easily brew your own at home? It’s surprisingly simple, incredibly rewarding, and allows you to customize flavors to your heart’s content. This guide will walk you through everything you need to know, from the basics of kombucha to troubleshooting common issues and creating exciting flavor combinations. So, grab a glass, and let’s dive in!
What *is* Kombucha, Anyway?
At its core, kombucha is fermented sweetened tea. But it’s much more than that! The magic happens thanks to a SCOBY – a Symbiotic Culture Of Bacteria and Yeast. This isn’t a single organism, but rather a community working together to transform sweet tea into a probiotic-rich, slightly acidic drink. Think of it like a tiny, bubbly ecosystem living in your jar. Historically, kombucha’s origins can be traced back over 2,000 years to Northeast China, where it was valued for its detoxifying and energizing properties.
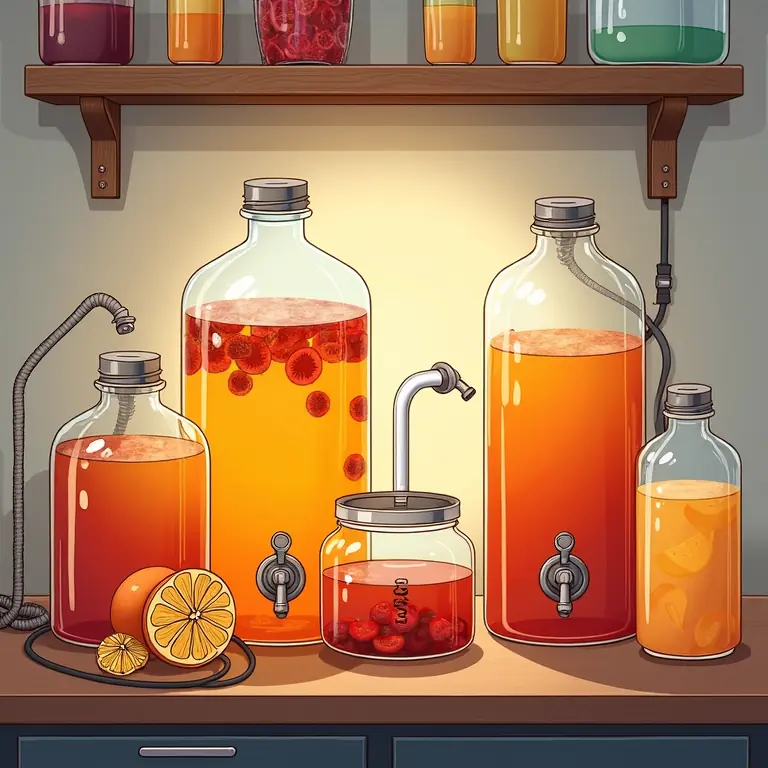
The Essential Equipment: Your Kombucha Starter Kit
Don’t be intimidated by the list! Most of this stuff you likely already have. Here’s what you’ll need:
- A Large Glass Jar: At least 1 gallon (3.8 liters) is ideal. Avoid plastic or metal, as the acidity of kombucha can react with them.
- SCOBY: This is the heart of your brew! You can get one from a friend who brews, purchase one online, or (with a bit more patience) grow your own (we’ll cover that later).
- Starter Tea: About 1 cup (240ml) of strong, unflavored kombucha from a previous batch. This helps lower the pH and protects your brew from mold.
- Tea: Black tea is the traditional choice, but green tea also works well. Organic is best to avoid pesticides. Avoid flavored or oiled teas.
- Sugar: Granulated white sugar is the SCOBY’s food source. Don’t worry, most of it gets consumed during fermentation!
- Water: Filtered water is essential for a clean-tasting brew.
- Breathable Cloth Cover: Cheesecloth, muslin, or a tightly woven dish towel.
- Rubber Band: To secure the cloth cover.
- Bottles: Glass bottles with airtight seals for the second fermentation (flavoring and carbonation). Swing-top bottles are popular.
- Optional: A thermometer, a pH strip, and a funnel.
The First Fermentation: Making the Base Kombucha
This is where the magic begins! Follow these steps carefully:
- Brew the Tea: Boil 1 gallon (3.8 liters) of water. Remove from heat and steep 8-10 tea bags (or 2 tablespoons of loose leaf tea) for 10-15 minutes.
- Dissolve the Sugar: Remove the tea bags and stir in 1 cup (200g) of sugar until completely dissolved.
- Cool the Tea: This is crucial! The tea *must* cool to room temperature before adding the SCOBY. Hot tea will kill the culture.
- Combine Ingredients: Pour the cooled sweet tea into your glass jar. Add the starter tea.
- Add the SCOBY: Gently place the SCOBY on top of the tea.
- Cover and Secure: Cover the jar with the breathable cloth and secure it with a rubber band. This keeps out fruit flies while allowing airflow.
- Ferment: Place the jar in a dark, well-ventilated area at room temperature (68-78°F / 20-26°C). Let it ferment for 7-30 days. The fermentation time depends on temperature, humidity, and your personal taste preference.
Testing Your Kombucha: After 7 days, start tasting your kombucha. Use a clean straw to draw a small sample. It should be tart, slightly sweet, and slightly fizzy. The longer it ferments, the less sweet and more vinegary it will become. A pH of between 2.5 and 3.5 is ideal – a pH strip can help you confirm this.
The Second Fermentation: Flavoring and Carbonation
This is where you get creative! The second fermentation is all about adding flavor and building up carbonation.
- Strain and Bottle: Once the first fermentation is complete, remove the SCOBY and about 1 cup of starter tea (save this for your next batch!). Strain the kombucha through a fine-mesh sieve or cheesecloth to remove any sediment.
- Add Flavorings: Pour the kombucha into glass bottles, leaving about 1-2 inches of headspace. Add your desired flavorings (see ideas below).
- Seal and Ferment: Seal the bottles tightly and let them ferment at room temperature for 1-3 days. Burp the bottles daily to release excess pressure (this prevents explosions!).
- Refrigerate: Once carbonated to your liking, refrigerate the bottles to slow down fermentation and maintain carbonation.
Flavor Combination Ideas:
- Fruit: Strawberries, blueberries, raspberries, peaches, mangoes, pineapple
- Juices: Ginger juice, pomegranate juice, apple juice
- Herbs & Spices: Ginger, mint, lavender, rosemary, cinnamon, cloves
- Purees: Pumpkin puree, peach puree
- Other: Vanilla extract, maple syrup (use sparingly)
Experiment and find your favorites! Start with small amounts of flavoring and adjust to taste.
Maintaining Your SCOBY Hotel
As you brew more kombucha, your SCOBY will grow and multiply. You’ll end up with multiple SCOBYs. Don’t throw them away! They’re valuable assets. Create a “SCOBY Hotel” – a jar filled with kombucha tea to store your extra SCOBYs. Feed the hotel with fresh sweet tea every few weeks to keep the SCOBYs healthy. This ensures you always have a backup in case something happens to your primary SCOBY.
Troubleshooting Common Kombucha Problems
Brewing kombucha isn’t always smooth sailing. Here are some common issues and how to fix them:
- Mold: Mold is the biggest concern. If you see fuzzy, colorful mold (green, black, blue), discard the entire batch (SCOBY and liquid). Start fresh with a new SCOBY. Prevention is key: maintain a clean brewing environment, use enough starter tea, and ensure proper airflow.
- Fruit Flies: Fruit flies are attracted to the sweet tea. Ensure your cloth cover is tightly secured.
- Slow Fermentation: If your kombucha isn’t fermenting, the temperature might be too low. Move the jar to a warmer location.
- Weak Carbonation: Make sure your bottles have airtight seals. Add a bit more sugar or fruit juice during the second fermentation. Allow sufficient time for carbonation.
- SCOBY Sinking: A sinking SCOBY is perfectly normal. It doesn’t indicate a problem. A new SCOBY will form on the surface.
- Brown Strands: These are yeast strands and are completely harmless. They’re a sign of a healthy fermentation.
Growing Your Own SCOBY
If you can’t get your hands on a SCOBY, you can grow one from a bottle of unflavored, raw kombucha. It takes patience, but it’s a fun project.
- Combine: Pour 1 cup of raw kombucha into a clean glass jar.
- Add Tea: Add 1 tablespoon of sugar and 2 tea bags (black or green) to the kombucha.
- Cover and Ferment: Cover with a breathable cloth and secure with a rubber band.
- Wait: Let it sit undisturbed at room temperature for 2-4 weeks. A SCOBY will gradually form on the surface.
Once the SCOBY is about ¼ inch thick, you can use it to brew your first batch of kombucha!
Beyond the Basics: Exploring Kombucha Creativity
Once you’ve mastered the basic process, the possibilities are endless. Consider these ideas:
- Cascading Fermentation: Instead of bottling all of your kombucha after the first fermentation, leave some in the jar with the SCOBY and continue to ferment it for a longer, more tart flavor.
- Kombucha Vinegar: Allowing kombucha to ferment for an extended period (4+ weeks) will result in a kombucha vinegar, perfect for salad dressings and marinades.
- Kombucha Cocktails: Use kombucha as a base for refreshing cocktails.
- Kombucha Mocktails: Create alcohol-free cocktails with kombucha and fruit juices.
Resources and Further Learning
Want to expand your knowledge? Here are some helpful resources:
- The Big Book of Kombucha by Hannah Crum and Alex LaGory
- Kombucha Kamp: https://kombuchakamp.com/
And if you’re feeling inspired to create something with your hands, why not explore other DIY projects? You might enjoy learning how to build a better birdhouse, design a creative bulletin board or even learn the art of Kintsugi repair.
Happy brewing! Kombucha is a journey of experimentation and discovery. Don’t be afraid to try new things, and most importantly, have fun!
Discussion about this post