
Build a Better Book Nook: A Friendly Guide to Miniature Worlds
Have you ever lost yourself in a book and wished you could *step inside* the story? While teleportation technology isn’t quite here yet, building a book nook offers the next best thing: a cozy, immersive miniature world built right into your bookshelf! More than just a pretty display, a book nook is a creative outlet, a relaxing hobby, and a beautiful way to celebrate your love of reading. This guide will walk you through everything you need to know to create a book nook you’ll adore, from planning and materials to construction and finishing touches.
What *is* a Book Nook?
Essentially, a book nook (also sometimes called a diorama shelf) is a miniature scene nestled within the space between your books on a bookshelf. They’re typically viewed through the gap between books, creating a ‘window’ into another world. These worlds can be anything you can imagine: a cozy cottage, a bustling city street, a magical forest, a fantastical spaceship, or even a recreation of a favorite book scene. The possibilities are truly endless!
Book nooks have seen a huge surge in popularity recently, driven by social media platforms like Instagram and TikTok. People are captivated by the intricate details and immersive qualities of these miniature creations. But don’t let the elaborate examples you see online intimidate you. You can start with a simple design and gradually add complexity as your skills develop.
Planning Your Miniature World: The First Steps
Before you start gathering materials, it’s crucial to have a plan. This will save you time, money, and frustration in the long run. Here’s a breakdown of the planning process:
1. Choose a Theme
This is the most exciting part! What kind of world do you want to create? Consider your favorite books, movies, or hobbies. Do you dream of a quaint Japanese garden, a gothic library, a pirate cove, or a snow-covered village? Brainstorm a few ideas and choose one that really resonates with you. Don’t be afraid to be unique and personal. If you’re a fan of observing nature, you might find inspiration in companion planting – perhaps a miniature garden scene!
2. Measure Your Space
This is *critical*. Measure the height, width, and depth of the space where your book nook will reside. This will dictate the size of your base and the scale of your miniature elements. Sketch out the area on paper and mark the dimensions. Remember to account for the thickness of your bookshelf itself.
3. Sketch Your Design
Once you have your theme and dimensions, start sketching! Don’t worry about artistic perfection; the goal is to visualize the layout and elements of your book nook. Consider the perspective – how will the scene be viewed from the outside? Think about layers and depth to create a more immersive effect. Include key elements like buildings, trees, furniture, and characters. You can find tons of inspiration online (Pinterest is a great resource!).
4. Choose a Scale
Scale refers to the ratio between the size of your miniature elements and their real-life counterparts. Common scales for book nooks include 1:24 (dollhouse scale), 1:48, and 1:87. Choosing a scale will help you ensure that all your miniature items are proportionally correct. 1:24 is a good starting point as it’s relatively easy to find pre-made items in this scale. Smaller scales (like 1:87) require more precision and detail.
Gathering Your Materials: The Toolkit of a Miniature World Builder
Now for the fun part: collecting your supplies! Here’s a comprehensive list of materials you’ll likely need:
Essential Materials
- Base: Foam board, MDF board, or plywood. The size will be determined by your measurements.
- Glue: Wood glue, PVA glue, and super glue (use sparingly!).
- Cutting Tools: Craft knife, scissors, and a cutting mat.
- Paint: Acrylic paints in a variety of colors.
- Lighting: LED strip lights or individual LED lights. Battery-operated options are easiest to install.
- Miniature Materials: This is where your theme comes to life! Consider:
- Buildings (pre-made or scratch-built)
- Trees and foliage
- Furniture
- Characters
- Cobblestones, gravel, and other ground cover
- Fencing and other architectural details
Optional Materials
- Texturing Materials: Sand, flocking powder, moss, and other materials to create realistic textures.
- Acrylic Sheets: For creating windows or other transparent elements.
- Modeling Clay: For sculpting details or creating custom elements.
- Weathering Powders: To add age and realism to your scene.
- Mirror: To create the illusion of depth.
Where to find materials? Craft stores, hobby shops, online retailers (like Amazon and Etsy), and even your own recycling bin! Don’t underestimate the potential of repurposing everyday items – cardboard boxes, plastic containers, and bottle caps can all be transformed into miniature treasures.
Construction Time: Building Your Miniature World
With your plan and materials in place, it’s time to start building! Here’s a step-by-step guide:
Step 1: Prepare the Base
Cut your base material to the correct size. If using foam board, reinforce the edges with wood strips for added stability. If using MDF or plywood, sand the edges smooth.
Step 2: Create the Background
Paint the back of the base with a suitable background color. You can create a sky, a distant landscape, or the interior of a room. Consider using a gradient effect to add depth. You could also print a background image and adhere it to the base.
Step 3: Build the Structure
Start building the main structures of your scene. This might involve assembling pre-made buildings, constructing buildings from scratch (using foam board or cardboard), or creating landscape features like hills and valleys. Use wood glue or PVA glue to secure the elements to the base. Allow the glue to dry completely before proceeding.
Step 4: Add Details and Textures
This is where the magic happens! Add details like cobblestones, gravel, trees, furniture, and characters. Use texture materials to create realistic surfaces. For example, sprinkle sand on a path to create a gritty texture, or glue small pieces of moss to a tree trunk. Remember to work in layers, starting with the larger elements and then adding smaller details.
Step 5: Install the Lighting
Carefully install your LED lights. Conceal the wires as much as possible. Test the lights to ensure they are working properly. Lighting can dramatically enhance the atmosphere of your book nook.
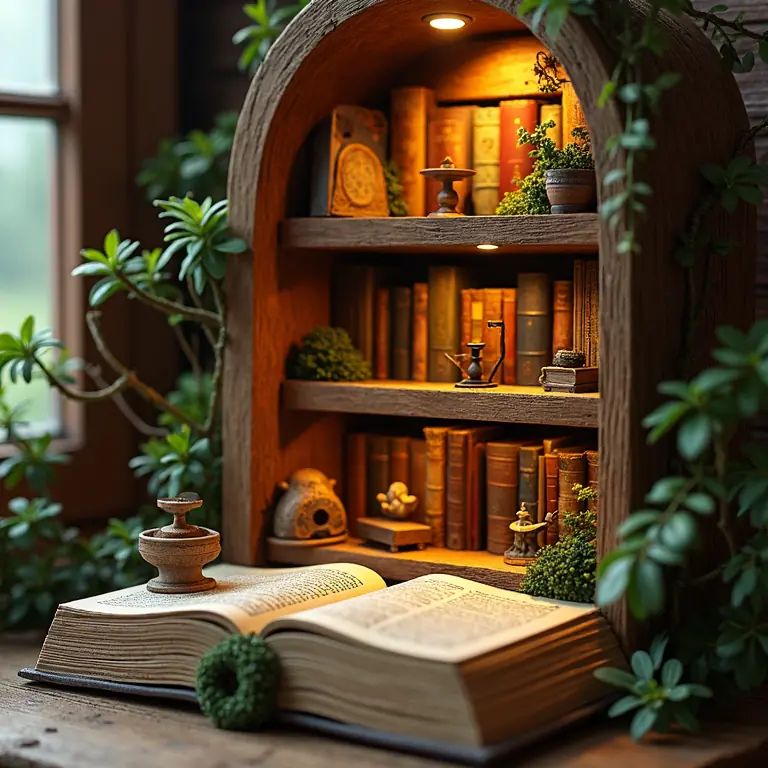
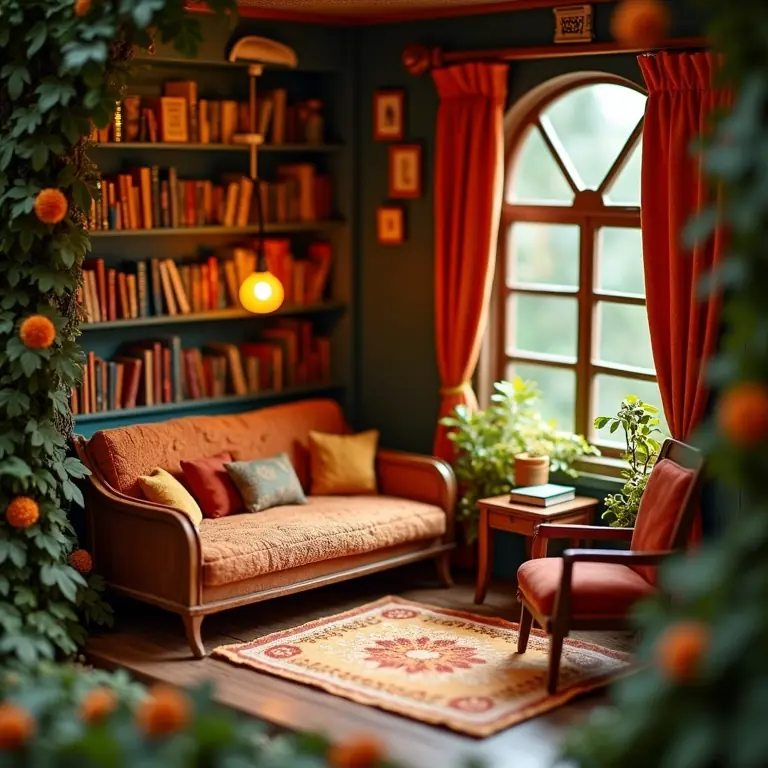
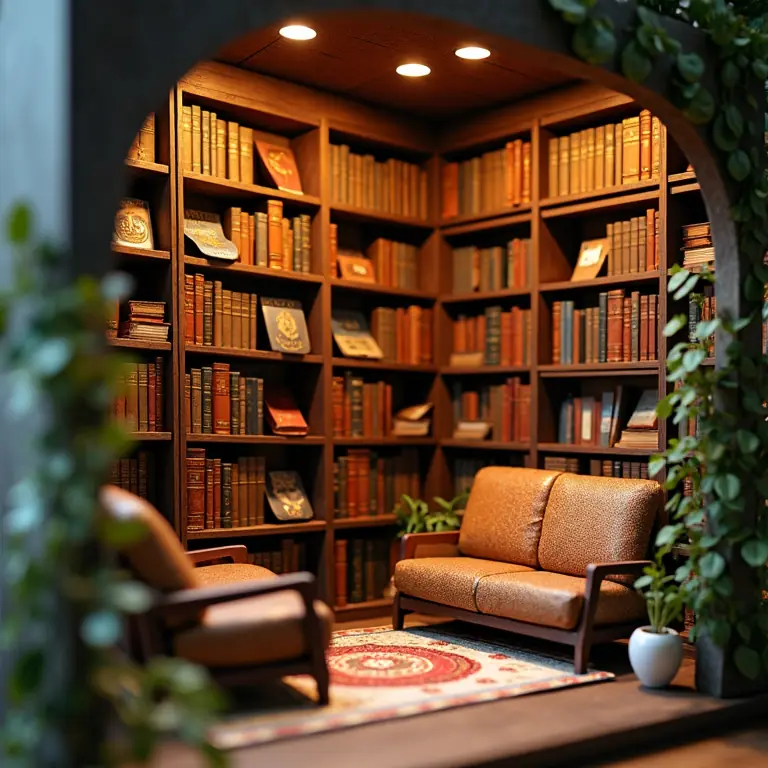
Here’s a look at some incredibly detailed miniature worlds. It’s inspiring to see what others have created!
Finishing Touches: Bringing Your Book Nook to Life
Once the basic construction is complete, it’s time to add the finishing touches that will truly bring your book nook to life:
1. Weathering and Aging
Use weathering powders or washes to add age and realism to your scene. Apply a small amount of powder to crevices and edges to create a worn look. You can also use dry brushing techniques to highlight textures.
2. Adding Small Details
Pay attention to the small details. Add miniature books to a bookshelf, a teacup to a table, or a flowerpot to a windowsill. These small touches can make a big difference.
3. Final Lighting Adjustments
Adjust the lighting to create the desired atmosphere. Experiment with different colors and brightness levels. You can use colored gels to create special effects.
4. Presentation
Once your book nook is complete, carefully place it in your bookshelf. Adjust the surrounding books to create a pleasing visual effect. Step back and admire your creation!
Advanced Techniques: Taking Your Book Nook to the Next Level
Once you’ve mastered the basics, you can explore more advanced techniques to create even more impressive book nooks:
- Scratch-Building: Learn to build structures from scratch using foam board, cardboard, and other materials.
- Sculpting: Use modeling clay to create custom characters and details.
- Electronics: Incorporate more complex electronic elements, such as moving parts or sound effects.
- Resin Casting: Create realistic water features or other transparent elements.
- Foraging for Materials: Collecting natural materials like twigs, leaves, and stones to add authenticity.
Troubleshooting Common Problems
Even the most experienced book nook builders encounter challenges. Here are some common problems and solutions:
- Glue Not Holding: Use the appropriate glue for the materials you are working with. Ensure the surfaces are clean and dry.
- Paint Cracking: Use a primer before painting. Apply thin coats of paint.
- Lighting Not Working: Check the batteries and connections. Ensure the wires are not damaged.
- Structure Instability: Reinforce the structure with additional supports.
Expanding Your Horizons: Beyond Book Nooks
The skills you develop building book nooks can be applied to other miniature projects. You might enjoy building dollhouses, dioramas, or miniature gardens. If you’re interested in exploring the cosmos, building a backyard observatory could be your next adventure! Check out this guide to amateur astronomy for inspiration. Or, if you are looking to understand your digital presence, you might find this guide to online privacy settings useful.
Final Thoughts
Building a book nook is a rewarding and creative hobby that allows you to express your imagination and celebrate your love of reading. Don’t be afraid to experiment, make mistakes, and learn from your experiences. The most important thing is to have fun! So gather your materials, unleash your creativity, and start building your own miniature world today.
Discussion about this post