
Craft Cozy Candles: A Friendly Guide to Wax Blending & Scent Throw
So, you’re dreaming of filling your home (or even starting a small business!) with the warm glow and inviting scents of handmade candles? Fantastic! Candle making is a wonderfully rewarding hobby – and it’s more approachable than you might think. This guide will walk you through everything from wax types and blending to achieving a beautiful, strong scent throw. We’ll keep it friendly, informative, and focused on setting you up for success.
Part 1: Understanding Your Wax Options
The wax is the foundation of your candle, so choosing the right one is crucial. There’s a whole world of options, each with its own pros and cons. Here’s a breakdown of the most popular choices:
- Soy Wax: The darling of the eco-conscious candlemaker! Soy wax is a natural, renewable resource derived from soybeans. It burns cleaner than paraffin wax, meaning less soot and a longer-lasting candle. It’s also biodegradable. However, soy wax can sometimes have a “frosting” effect (a white, crystalline coating) which is purely cosmetic but some find undesirable. Scent throw can be a little more subtle with soy wax, requiring a bit more fragrance oil.
- Paraffin Wax: The traditional choice, and still very popular. Paraffin wax holds fragrance well and provides a strong scent throw. It’s also relatively inexpensive. However, it’s a petroleum byproduct and doesn’t burn as cleanly as other waxes.
- Beeswax: A completely natural option with a lovely, subtle honey scent. Beeswax burns very cleanly and slowly. It’s also hypoallergenic. The downside is that it’s more expensive than other waxes and can be tricky to work with – it has a higher melting point. It also doesn’t hold as much fragrance oil.
- Coconut Wax: Increasingly popular, coconut wax is made from the oil of coconuts. It burns incredibly cleanly and has an excellent scent throw. It’s also a sustainable option. Like beeswax, it’s more expensive than soy or paraffin.
- Wax Blends: Don’t be afraid to experiment! Many candlemakers use blends to get the best of both worlds. A common blend is soy and paraffin, combining the clean burning of soy with the strong scent throw of paraffin. Coconut and soy blends are also popular.
Part 2: Wax Blending – The Art of Combination
Blending waxes allows you to tailor your candles to your specific preferences. Here’s how to approach it:
- Start Small: Begin with small batches to test your blends. A good starting point is a 50/50 blend, then adjust from there.
- Consider Melt Points: Different waxes have different melting points. Blending waxes with significantly different melt points can affect the candle’s burn. Generally, you want to keep the melt points relatively close.
- Think About Scent Throw: If you want a strong scent throw, consider blending a wax known for holding fragrance well (like paraffin) with a cleaner-burning wax (like soy).
- Experiment with Ratios: Keep a detailed record of your blends! Note the ratios of each wax, the fragrance oil used, and the resulting burn characteristics.
- Common Blends:
- Soy/Paraffin (60/40): A good balance of clean burning and scent throw.
- Coconut/Soy (70/30): Excellent scent throw and a very clean burn.
- Beeswax/Soy (50/50): Adds a subtle honey scent and extends burn time.
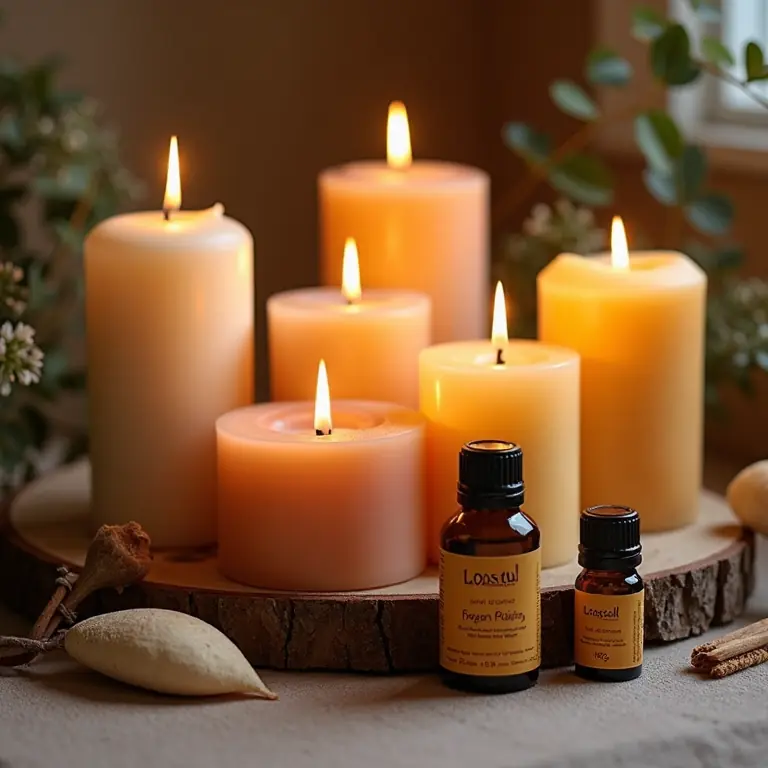
Part 3: Fragrance Oils – The Soul of Your Candle
Choosing the right fragrance oil is arguably the most fun part of candle making! But it’s also important to understand how fragrance oils interact with different waxes.
- Fragrance Load: This refers to the percentage of fragrance oil you add to the wax. Most waxes can hold between 6-10% fragrance oil. Exceeding this can lead to separation (the oil pooling on top of the wax) or a poor burn.
- Fragrance Oil Type: There are two main types:
- Natural Essential Oils: Derived from plants, essential oils offer a natural scent but tend to be less potent than synthetic fragrance oils. They also have a higher price point.
- Synthetic Fragrance Oils: Created in a lab, synthetic fragrance oils offer a wider range of scents and are generally more affordable.
- Flash Point: This is the temperature at which the fragrance oil can ignite. It’s crucial to heat the wax *below* the flash point of your fragrance oil to prevent a fire hazard.
- Testing: Always test your fragrance oil with a small batch of wax before making a large batch. This will help you determine the optimal fragrance load and ensure a good scent throw.
Part 4: Achieving a Powerful Scent Throw
Scent throw – how well the fragrance fills a room – is the ultimate measure of a successful candle. Here’s how to maximize it:
- Wax Choice: As mentioned earlier, some waxes hold fragrance better than others.
- Fragrance Load: Using the maximum recommended fragrance load for your wax type is essential.
- Heating & Pouring Temperature: Pouring the wax at the correct temperature is vital. Too hot, and the fragrance oil can evaporate. Too cool, and it won’t bind properly with the wax. Check your wax manufacturer’s recommendations.
- Curing Time: This is often overlooked! Allowing your candles to cure for at least 1-2 weeks (longer is better) allows the fragrance oil to fully bind with the wax, resulting in a stronger scent throw.
- Wick Selection: A properly sized wick is crucial. Too small, and the candle won’t create a full melt pool (the melted wax across the surface). Too large, and the candle will smoke and burn too quickly. We’ll cover wicks in detail in Part 5.
Part 5: Wicks – The Engine of Your Candle
The wick is responsible for drawing the melted wax up to the flame. Choosing the right wick is critical for a clean, even burn and a good scent throw.
- Wick Types:
- Cotton Wicks: The most common type, available in various sizes and constructions.
- Wood Wicks: Offer a crackling sound and a unique aesthetic. They can be more challenging to work with and may require more testing.
- Wick Size: This is determined by the diameter of your candle container. Wick suppliers typically provide wick size guides based on container diameter.
- Wick Testing: Always test your wicks! Burn a test candle and observe the following:
- Melt Pool: Is the melt pool reaching the edges of the container within 3-4 hours?
- Sooting: Is the candle producing excessive soot?
- Flame Height: Is the flame too large or too small?
- Double Wicking: For wider containers, you may need to use two wicks to achieve a full melt pool.
Part 6: Essential Equipment – Getting Started
You don’t need a ton of expensive equipment to get started. Here’s a basic list:
- Double Boiler or Wax Melting Pot: Essential for safely melting the wax.
- Thermometer: To monitor the wax temperature.
- Pouring Pot: For pouring the melted wax into your containers.
- Containers: Choose heat-safe containers designed for candles.
- Wicks: Select the appropriate wick size and type.
- Fragrance Oils: Choose high-quality fragrance oils.
- Scale: For accurately measuring wax and fragrance oil.
- Stirring Utensil: A heat-resistant spatula or spoon.
- Wick Stickers or Glue Dots: To secure the wicks to the bottom of the containers.
Part 7: Safety First!
Candle making involves working with hot wax and flammable materials. Safety should always be your top priority.
- Never leave melting wax unattended.
- Use a thermometer to monitor the wax temperature and avoid overheating.
- Work in a well-ventilated area.
- Keep flammable materials away from the melting wax.
- Have a fire extinguisher nearby.
- Always follow the manufacturer’s instructions for your wax and fragrance oil.
Part 8: Beyond the Basics – Taking Your Candle Making to the Next Level
Once you’ve mastered the basics, you can start exploring more advanced techniques:
- Dyeing Candles: Add color to your candles using candle dyes.
- Embeds & Decorations: Embed dried flowers, crystals, or other decorative elements into your candles.
- Layered Candles: Create candles with multiple layers of different colors and fragrances.
- Building a Brand: If you’re considering selling your candles, it’s important to develop a strong brand identity. Check out this article on building your brand to get started.
Part 9: Resources & Further Learning
There are tons of great resources available to help you learn more about candle making:
- Candle Science: https://www.candlescience.com – A wealth of information on waxes, wicks, and fragrance oils.
- Lone Star Candle Supply: https://www.lonestarcandlesupply.com – Another great supplier with helpful resources.
- YouTube: Search for “candle making tutorial” on YouTube for countless video demonstrations.
And if you’re interested in other DIY crafts, why not explore vinyl record cleaning or even metal detecting?
So, there you have it – a comprehensive guide to crafting cozy candles! Don’t be afraid to experiment, have fun, and enjoy the process. With a little practice, you’ll be creating beautiful, fragrant candles in no time.
Discussion about this post