
Decode Your Garden Soil: A Friendly Guide to Simple Soil Testing
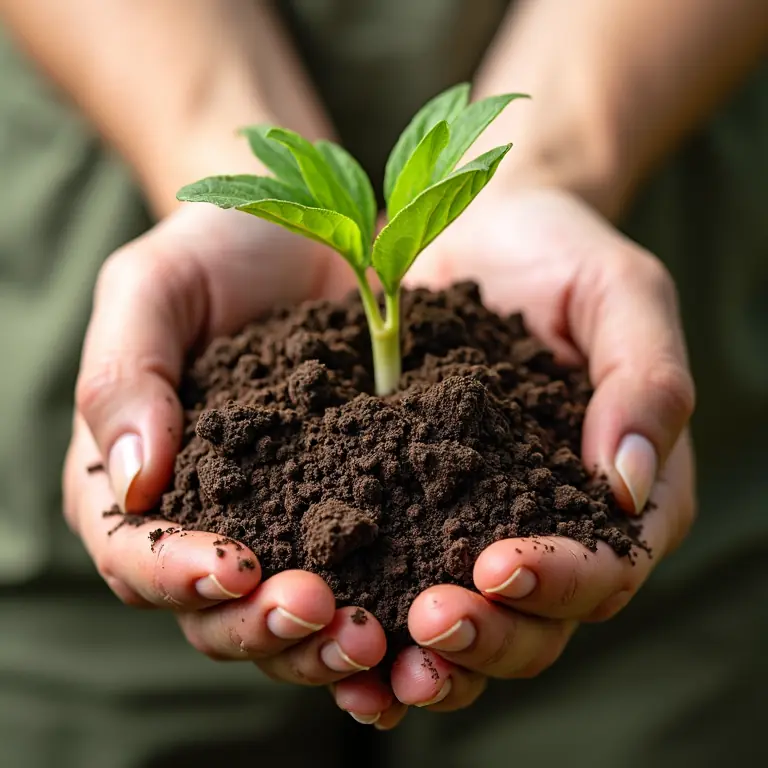
So, you’re dreaming of a thriving garden, bursting with colorful blooms and delicious, homegrown vegetables? Fantastic! But before you even think about seeds or seedlings, let’s talk about the foundation of it all: your soil. Often overlooked, soil is a complex, living ecosystem, and understanding its composition is the key to unlocking your garden’s full potential. This guide will walk you through simple soil testing methods, helping you decode what your soil is telling you and how to amend it for a flourishing garden. We’ll cover everything from basic visual assessments to DIY tests you can do at home, and when it’s time to call in the professionals. Think of it as becoming a soil detective!
Why Bother Testing Your Soil?
You might be thinking, “My plants seem okay, why test the soil?” Good question! Even if your plants *appear* healthy, they may not be reaching their full potential. Soil testing reveals hidden deficiencies or imbalances that are limiting growth. Here’s why it’s so important:
- Nutrient Levels: Soil tests reveal the levels of essential nutrients like nitrogen (N), phosphorus (P), and potassium (K) – the building blocks for plant growth. Too much or too little of these can cause problems.
- pH Level: pH measures how acidic or alkaline your soil is. Most plants prefer a slightly acidic to neutral pH (around 6.0-7.0). If your soil’s pH is too high or too low, plants can’t absorb nutrients effectively, even if they’re present.
- Organic Matter: Organic matter improves soil structure, water retention, and nutrient availability. Testing helps you assess whether your soil has enough.
- Soil Texture: Knowing the proportion of sand, silt, and clay helps you understand how well your soil drains and holds nutrients.
- Potential Contaminants: Tests can sometimes identify the presence of heavy metals or other contaminants that could harm your plants and, potentially, you.
Essentially, soil testing isn’t just about fixing problems; it’s about preventative care. It’s like getting a check-up for your garden, ensuring it has everything it needs to thrive.
Step 1: The Visual Inspection – A First Clue
Before you reach for testing kits, start with a simple visual inspection. This is free and can offer valuable initial clues.
- Color: Dark soil generally indicates a high organic matter content, which is good. Pale or grayish soil might suggest a lack of nutrients or poor drainage.
- Structure: Is your soil crumbly and easily broken apart? That’s a good sign. Is it compacted and hard to dig? That suggests poor structure and potential drainage issues.
- Drainage: Dig a small hole and fill it with water. How quickly does the water drain? If it drains very quickly, your soil is likely sandy. If it drains slowly, it’s likely clay-heavy.
- Root Growth: Examine the roots of existing plants. Are they healthy and vigorous, or stunted and shallow? Poor root growth can indicate soil problems.
- Weeds: The types of weeds growing in your garden can also be indicators of soil conditions. For example, dandelions thrive in compacted soil, while clover often indicates acidic soil.
Step 2: DIY Soil Tests – Getting Your Hands Dirty
Now, let’s get practical with some simple soil tests you can do at home. These won’t be as precise as a lab test, but they’ll give you a good starting point.
The Squeeze Test – Determining Soil Texture
- Moisten a handful of soil with water.
- Squeeze the soil in your hand.
- Sandy Soil: Falls apart immediately and feels gritty.
- Silty Soil: Holds its shape briefly, feels smooth when wet, and slightly slippery when dry.
- Clay Soil: Forms a long ribbon, feels sticky when wet, and is hard to break apart.
Most soils are a combination of these three textures. Knowing the dominant texture helps you understand drainage and nutrient retention.
The Jar Test – Estimating Soil Composition
- Fill a clear jar about halfway with soil.
- Add water until the jar is almost full.
- Shake vigorously for several minutes.
- Let the jar sit undisturbed for 24-48 hours.
- Layers will form: sand at the bottom, silt in the middle, and clay on top. Organic matter will float on the surface.
- Measure the height of each layer to estimate the percentage of each component.
The pH Test – Assessing Acidity or Alkalinity
You can purchase inexpensive soil pH testing kits at most garden centers. These typically involve mixing soil with distilled water and a pH indicator solution. The color of the solution will indicate the pH level. You can also use a digital pH meter for more accurate readings.
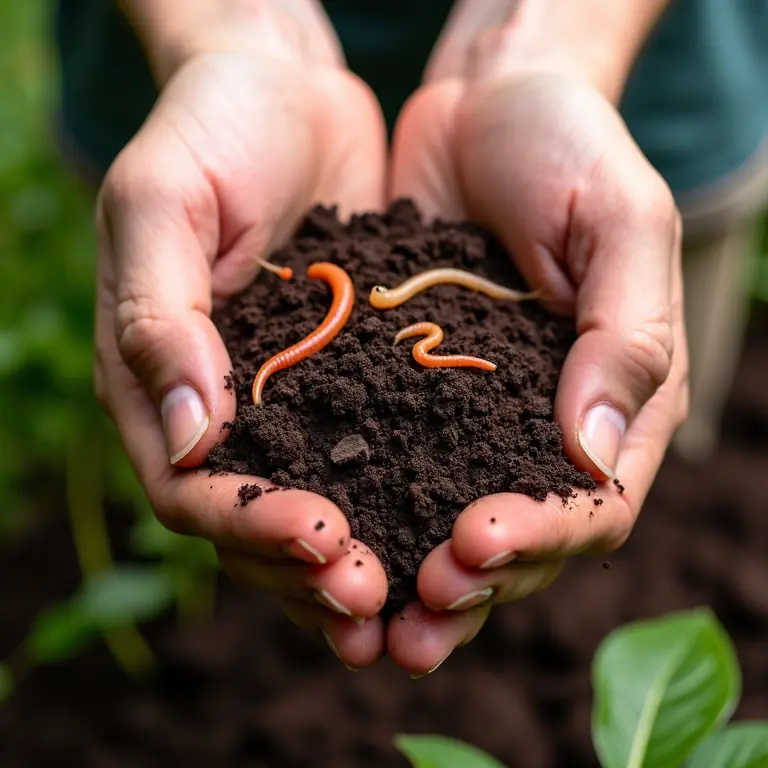
The Worm Test – A Sign of Life
Dig up a shovel-full of soil and look for earthworms! Earthworms are a fantastic sign of healthy soil, indicating good organic matter content and drainage. The more worms, the better!
Step 3: Understanding Your Results & Basic Amendments
So, you’ve done some testing. Now what? Here’s how to interpret some common results and what you can do about them.
- Sandy Soil: Drains quickly, doesn’t hold nutrients well. Amend with: Compost, manure, peat moss to improve water retention and fertility.
- Clay Soil: Poor drainage, compacts easily. Amend with: Compost, aged bark, gypsum to improve drainage and structure.
- Low pH (Acidic Soil): Plants can’t absorb nutrients effectively. Amend with: Lime (follow package directions carefully!).
- High pH (Alkaline Soil): Also limits nutrient absorption. Amend with: Sulfur, peat moss, or composted pine needles.
- Low Organic Matter: Soil lacks essential nutrients and structure. Amend with: Compost, manure, cover crops (like clover or rye).
Remember to incorporate amendments thoroughly into the soil by digging or tilling. And always follow package directions for any amendments you use.
Step 4: When to Call in the Professionals – Lab Soil Testing
While DIY tests are helpful, they provide only a general overview. For a comprehensive and accurate assessment, consider sending a soil sample to a reputable soil testing laboratory. Here’s why:
- Precise Nutrient Analysis: Labs provide detailed measurements of macronutrients (N, P, K) and micronutrients (iron, manganese, zinc, etc.).
- Accurate pH Measurement: More precise pH readings than home kits.
- Organic Matter Content: A more accurate assessment of organic matter levels.
- Heavy Metal Testing: Can identify potential contaminants.
- Customized Recommendations: Labs often provide specific recommendations for amendments based on your soil type and the plants you plan to grow.
To find a lab near you, contact your local agricultural extension office or search online for “soil testing labs.” They’ll provide instructions on how to collect and submit your sample.
Resources for Further Learning
Want to dive deeper into the world of soil science? Here are a few helpful resources:
- Your Local Agricultural Extension Office: A wealth of information and resources specific to your region.
- The National Gardening Association: https://garden.org/
- Soil Science Society of America: https://www.soils.org/
A Final Thought: Soil is Alive!
Remember, soil isn’t just dirt; it’s a living ecosystem teeming with billions of microorganisms that play a vital role in plant health. By understanding your soil and providing it with the right care, you’re not just growing plants – you’re nurturing a thriving environment. Happy gardening!
Want to learn more about caring for other aspects of your home and garden? Check out these helpful guides:
- A Friendly Guide to Basic Rope Care & Maintenance
- A Friendly Guide to Basic Textile Conservation
- A Friendly Guide to Backyard Ornithology
Discussion about this post