
Restore & Relish: A Friendly Guide to Antique Typewriter Restoration
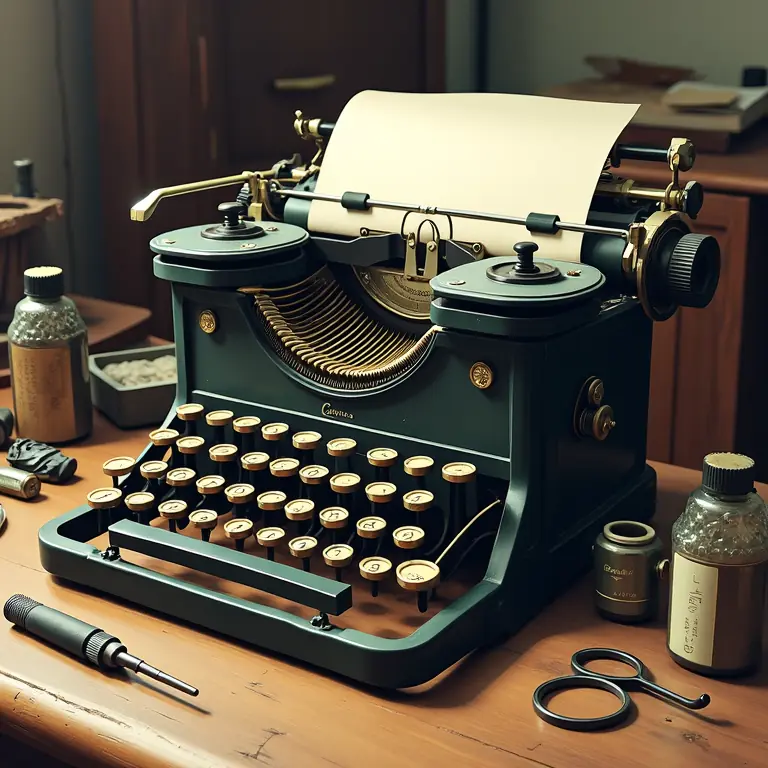
So, you’ve found a beautiful, but neglected, antique typewriter. Perhaps it was gathering dust in your grandmother’s attic, or maybe you snagged a bargain at an estate sale. Congratulations! You’re about to embark on a rewarding journey – restoring a piece of history and bringing it back to life. This guide will walk you through the process, from initial assessment to final polishing, with a friendly and educational approach. Don’t be intimidated; while it can be meticulous work, much of typewriter restoration is within the reach of a dedicated beginner. We’ll cover the tools you’ll need, common problems you’ll encounter, and how to tackle them. And remember, patience is key!
I. Assessing the Condition: What Have You Got Yourself Into?
Before you even *think* about cleaning, you need to understand the typewriter’s current condition. This will dictate how much work is involved and what parts you might need to source. Here’s a breakdown of what to look for:
- Physical Condition: Check for obvious rust, dents, broken keys, and missing parts. Look closely at the frame – is it solid, or is there significant corrosion?
- Key Movement: Press each key. Do they all move freely? Do they return properly? Some stickiness is normal, but keys that are completely stuck or offer excessive resistance need attention.
- Typebar Alignment: Examine the typebars (the metal arms with the letters). Are they bent or damaged? Do they strike the platen (the rubber roller) evenly? Misaligned typebars are a common issue.
- Carriage Function: Does the carriage (the part that holds the paper) move smoothly across the platen? Is the return mechanism working?
- Ribbon System: Is the ribbon spool mechanism functional? Is there a ribbon installed, and if so, is it petrified with age?
- Internal Gunk: Typewriters are notorious for accumulating dust, dried ink, and other debris inside. This is where a lot of the work lies.
Take photos of the typewriter from all angles *before* you start. This will serve as a valuable reference point, especially if you need to disassemble anything. Make a detailed list of all the issues you find, ranking them by severity. This will help you prioritize your work.
II. Gathering Your Tools: The Restorer’s Toolkit
You don’t need a professional mechanic’s set, but having the right tools will make the process much easier and prevent damage. Here’s a list of essentials:
- Screwdrivers: A set of both flathead and Phillips head screwdrivers in various sizes is crucial. Japanese precision screwdrivers are highly recommended for their quality and fit.
- Wrenches: A small set of adjustable wrenches and possibly some fixed-size wrenches will be helpful.
- Pliers: Needle-nose pliers are indispensable for reaching into tight spaces and manipulating small parts.
- Soft Brushes: A variety of soft brushes, including toothbrush-sized brushes, are essential for cleaning.
- Cleaning Solvents: Mineral spirits (odorless), isopropyl alcohol (90% or higher), and a gentle degreaser are all useful. *Avoid* harsh chemicals like acetone, as they can damage the finish.
- Lubricants: Specialized typewriter oil (sewing machine oil can be a substitute) is essential for lubricating moving parts. Do *not* use WD-40 – it attracts dust and will gum up the mechanism over time.
- Rust Remover: There are various rust removal products available. Choose one that is suitable for metal and won’t damage paint or other finishes.
- Polishing Cloths: Soft, lint-free cloths for polishing the exterior.
- Cotton Swabs: For applying cleaning solvents and lubricants to small areas.
- Small Containers: For organizing small parts.
- Magnifying Glass: To examine small parts closely.
- Gloves: To protect your hands.
III. Disassembly: Taking it Apart (Carefully!)
Before you start taking things apart, *always* refer to a service manual for your specific typewriter model if possible. These can often be found online. If a manual isn’t available, proceed with caution and take plenty of photos. Disassemble in a logical order, and keep track of which parts came from where. Here’s a general approach:
- Exterior Cleaning: Start by gently wiping down the exterior with a damp cloth to remove loose dust and dirt.
- Key Removal: Most keys can be carefully pried off with a small screwdriver or keycap puller. Be gentle to avoid breaking them.
- Typebar Access: You’ll likely need to remove the carriage and other components to access the typebars.
- Internal Components: Carefully disassemble the internal mechanism, noting the position of each part. Don’t force anything!
As you disassemble, place parts in labeled containers to avoid confusion during reassembly. This is especially important for springs, screws, and other small items.
IV. Cleaning: The Heart of Restoration
Cleaning is arguably the most important part of the restoration process. Removing years of accumulated grime will not only improve the typewriter’s appearance but also ensure its smooth operation. Here’s how to tackle it:
- Dry Cleaning: Start with dry cleaning using soft brushes to remove loose dust and debris.
- Solvent Cleaning: Use mineral spirits or isopropyl alcohol to dissolve hardened grease and ink. Apply with cotton swabs or brushes, and wipe clean with a soft cloth.
- Typebar Cleaning: Pay special attention to the typebars. Carefully clean each one, removing any accumulated ink or corrosion.
- Internal Mechanism Cleaning: Thoroughly clean all internal components, removing any gunk that is hindering movement.
- Rust Removal: Apply rust remover to any rusted parts, following the product instructions carefully.
Take your time and be thorough. A clean typewriter is a happy typewriter!
V. Repairing Common Issues: Troubleshooting Your Typewriter
Here are some common problems you might encounter and how to address them:
- Stuck Keys: Often caused by dried ink or rust. Clean the key and its corresponding mechanism thoroughly, and lubricate with typewriter oil.
- Misaligned Typebars: This is a more complex issue. Carefully bend the typebar back into alignment using pliers. *Be very gentle* to avoid breaking it.
- Sticky Carriage: Clean and lubricate the carriage rails and the mechanism that drives it.
- Faulty Ribbon System: Clean the ribbon spools and check for any broken parts. Replace the ribbon with a new one.
- Broken Springs: Replacing broken springs can be challenging. You may need to source replacement springs from a typewriter parts supplier.
If you encounter a problem you’re unsure about, don’t hesitate to seek help from online forums or experienced typewriter restorers. Learning to diagnose problems is a skill that will serve you well in many areas of restoration!
VI. Lubrication: Keeping Things Running Smoothly
Once everything is clean and repaired, lubrication is key. Apply typewriter oil sparingly to all moving parts, including the typebars, carriage rails, and internal mechanism. Avoid over-lubricating, as this can attract dust and grime.
VII. Reassembly: Putting it All Back Together
Reassembly is the reverse of disassembly. Refer to your photos and notes, and take your time. Make sure all parts are properly aligned and securely fastened. Don’t force anything!
VIII. Final Polishing and Testing: The Moment of Truth
Once the typewriter is reassembled, give the exterior a final polish with a soft cloth. Install a new ribbon and test the typewriter thoroughly. Type a few sentences to ensure all keys are working correctly and the carriage is moving smoothly.
IX. Resources and Further Learning
Here are some resources to help you continue your typewriter restoration journey:
- Typewriter Database: https://typewriterdatabase.com/ – A comprehensive database of typewriter models and information.
- Typewriter Repair Forums: Online forums where you can ask questions and get advice from experienced restorers.
- YouTube Tutorials: Many helpful typewriter restoration tutorials can be found on YouTube.
Here’s a video showcasing a fantastic restoration:
And another:
X. Beyond Restoration: Enjoying Your Typewriter
Restoring a typewriter is more than just a technical exercise; it’s a connection to the past. Once your typewriter is back in working order, you can enjoy using it for writing, creating art, or simply admiring its beauty. Consider exploring creative outlets like stop-motion animation using your typewriter! Or, maybe you’ll find inspiration in crafting and create a cozy atmosphere while you write. The possibilities are endless. And remember, the journey of restoration is just as rewarding as the destination.
Discussion about this post