
Revive Your Records: A Friendly Guide to Vinyl Cleaning & Care
So, you’ve rediscovered (or perhaps just discovered!) the magic of vinyl. That warm, crackly sound, the large-format artwork, the ritual of placing the record on the turntable… it’s a wonderful experience. But like any beloved possession, your vinyl records require care and maintenance to stay in top condition and provide years of listening pleasure. This guide will walk you through everything you need to know about cleaning, storing, and generally caring for your vinyl collection, from the basics to more advanced techniques.
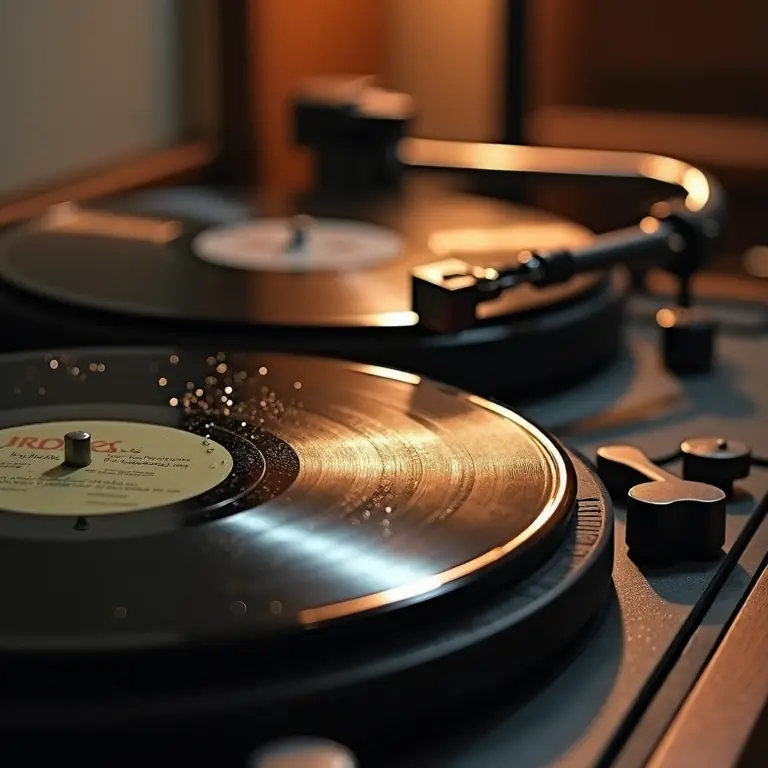
Why Clean Your Records?
It’s a simple question with a surprisingly complex answer. Dust, dirt, fingerprints, and even microscopic debris can accumulate on the surface of your records. These contaminants don’t just affect the sound quality; they actively degrade it. Here’s how:
- Reduced Sound Quality: Debris fills the grooves, causing distortion, pops, clicks, and a general muddiness in the sound.
- Stylus Wear: A dirty record forces your stylus to work harder to extract the audio information, accelerating wear and tear on this delicate component. Replacing styli can be expensive!
- Record Damage: Abrasive particles can scratch the vinyl surface, causing permanent damage.
- Long-Term Degradation: Even seemingly harmless dust can contribute to the gradual breakdown of the vinyl polymer over time.
Think of it this way: you wouldn’t drive through mud without washing your car afterward, right? The same principle applies to your records. Regular cleaning is an investment in their longevity and your listening enjoyment.
Understanding Vinyl Contamination
Before we dive into cleaning methods, let’s understand the different types of contaminants you’ll encounter:
- Dust: The most common culprit, consisting of airborne particles, fabric fibers, and general household dust.
- Fingerprints: Oils and acids from your skin can attract dust and damage the vinyl surface.
- Mold & Mildew: Can grow in humid environments, causing significant damage and affecting sound quality.
- Static Electricity: Attracts dust and can cause annoying pops and crackles.
- Release Agent: A residue left over from the record pressing process. Sometimes noticeable on new records.
- Old Cleaning Fluids: Residue from previous, ineffective cleaning attempts can actually worsen the problem.
Cleaning Methods: From Basic to Advanced
There’s a cleaning method to suit every budget and level of dedication. Let’s start with the basics and work our way up.
1. The Basic Brush & Spray (For Light Dust)
This is your everyday maintenance routine. You’ll need:
- A Carbon Fiber Record Brush: These brushes are specifically designed to dissipate static and lift dust from the grooves.
- Record Cleaning Solution: Avoid harsh chemicals like alcohol! Look for solutions specifically formulated for vinyl records.
- Microfiber Cloth: For gently drying the record.
Procedure:
- Place the record on your turntable (turned off!).
- Spray a small amount of cleaning solution onto the record surface.
- Gently hold the carbon fiber brush at a slight angle and sweep it across the record surface in a circular motion, following the grooves.
- Allow the record to air dry or gently wipe with a clean microfiber cloth.
Frequency: Before each play.
2. The Deep Clean: Hand Washing
For records that are visibly dirty or haven’t been cleaned in a while, a more thorough hand washing is necessary. You’ll need:
- Everything from the Basic Brush & Spray method.
- Distilled Water: Crucial! Tap water contains minerals that can leave residue.
- A Record Cleaning Basin or Sink: Dedicated to record cleaning only.
- Soft Cleaning Pads: Microfiber or specialized record cleaning pads.
Procedure:
- Fill the basin with distilled water and add a small amount of record cleaning solution (follow the solution’s instructions).
- Gently submerge the record in the solution.
- Using a soft cleaning pad, gently scrub the record surface in a circular motion, following the grooves. Avoid excessive pressure.
- Carefully flip the record and repeat the process on the other side.
- Rinse the record thoroughly with distilled water.
- Allow the record to air dry completely on a drying rack or clean microfiber cloth. Do not wipe the record while it’s wet.
Frequency: As needed, for dirty or neglected records.
3. The Vacuum Record Cleaning Machine (RCM)
For serious collectors and audiophiles, a vacuum record cleaning machine is the ultimate solution. These machines use a vacuum to remove cleaning fluid and debris from the record surface, leaving it spotless. They’re an investment, but the results are worth it.
(We won’t detail the operation of each RCM model here, as instructions vary. Refer to your machine’s manual.)
Frequency: For deep cleaning and regular maintenance, depending on your listening habits.
Record Storage: Protecting Your Investment
Cleaning is only half the battle. Proper storage is essential to prevent recontamination and physical damage.
- Inner Sleeves: Replace paper inner sleeves with high-quality, anti-static sleeves. These protect the record surface from scratches and dust. Look for sleeves made of rice paper or polyethylene.
- Outer Sleeves: Protect the record jacket from wear and tear with clear outer sleeves.
- Vertical Storage: Store records vertically, like books on a shelf. Stacking records horizontally can cause warping.
- Temperature & Humidity Control: Store records in a cool, dry place away from direct sunlight and heat sources. Excessive heat and humidity can damage the vinyl.
- Avoid Overcrowding: Don’t pack records too tightly together. This can cause warping and make it difficult to remove them without damaging the jackets.
Dealing with Specific Issues
Mold and Mildew
Mold and mildew can be a serious problem. If you discover mold on your records, it’s crucial to address it immediately. A solution of distilled water and isopropyl alcohol (a very small amount – less than 10%) can be used to gently clean the affected area. However, be very careful, as alcohol can damage the vinyl if used improperly. Consider consulting a professional record restoration service if the mold is extensive.
Warped Records
Warping occurs when the vinyl is no longer flat. Minor warping may not affect playback, but severe warping can cause tracking issues and distortion. There are record flattening machines available, but they can be expensive. Prevention is key – proper storage is the best defense against warping.
Sticky Records
Sticky records are often caused by old cleaning fluids or release agent residue. A thorough hand washing with distilled water and a specialized record cleaning solution can often resolve the issue.
Beyond Cleaning: Stylus Care
Don’t forget about your stylus! A clean stylus is essential for optimal sound quality and record preservation. Use a stylus brush to gently remove dust and debris after each listening session. Periodically use a stylus cleaning fluid to deep clean the stylus.
Resources & Further Reading
Here are some helpful resources for further exploration:
- Record Collector’s Guild: https://recordcollectorsguild.org/
- Steve Hoffman Music Forums: https://forums.stevehoffman.tv/ (A great place to ask questions and learn from other collectors.)
Final Thoughts
Taking care of your vinyl records is a rewarding experience. It’s about more than just preserving sound quality; it’s about cherishing a piece of musical history. By following these guidelines, you can ensure that your records will continue to bring you joy for years to come. Now, if you’re looking for another rewarding hobby, why not try metal detecting? Or perhaps explore your family history with basic genealogy charts? And if you’re looking to refine your personal brand, you might find our guide on crafting your personal elevator pitch to be useful!
Discussion about this post